

Hi everyone! this is Elizabeth from http://www.217Creations.blogspot.com. Thanks Pam for having me over to play! The cartridge we are exploring this month is Robotz. I have had this cartridge since it was launched but I have not used it a whole lot. Honestly, I asked Pam if I could do a different cartridge because I just wasn't feeling that "vibe" with this cartridge. But the more I looked at the handbook, the more I realized how much I like the font. I used the font in conjunction with Everyday Paper Dolls for this double layout. All the paper is from Coredinations Cardstock, including the sparkly black background. All the cuts have been inked using Tim Holtz Distress Ink in Black Soot with Fantastix (To see how I ink CLICK HERE FOR THE TUTORIAL)
Now be nice about my layout! This is only the 5th 12x12 I have ever done and only my 2nd double spread layout! You can also click on any picture to enlarge it and see the details.

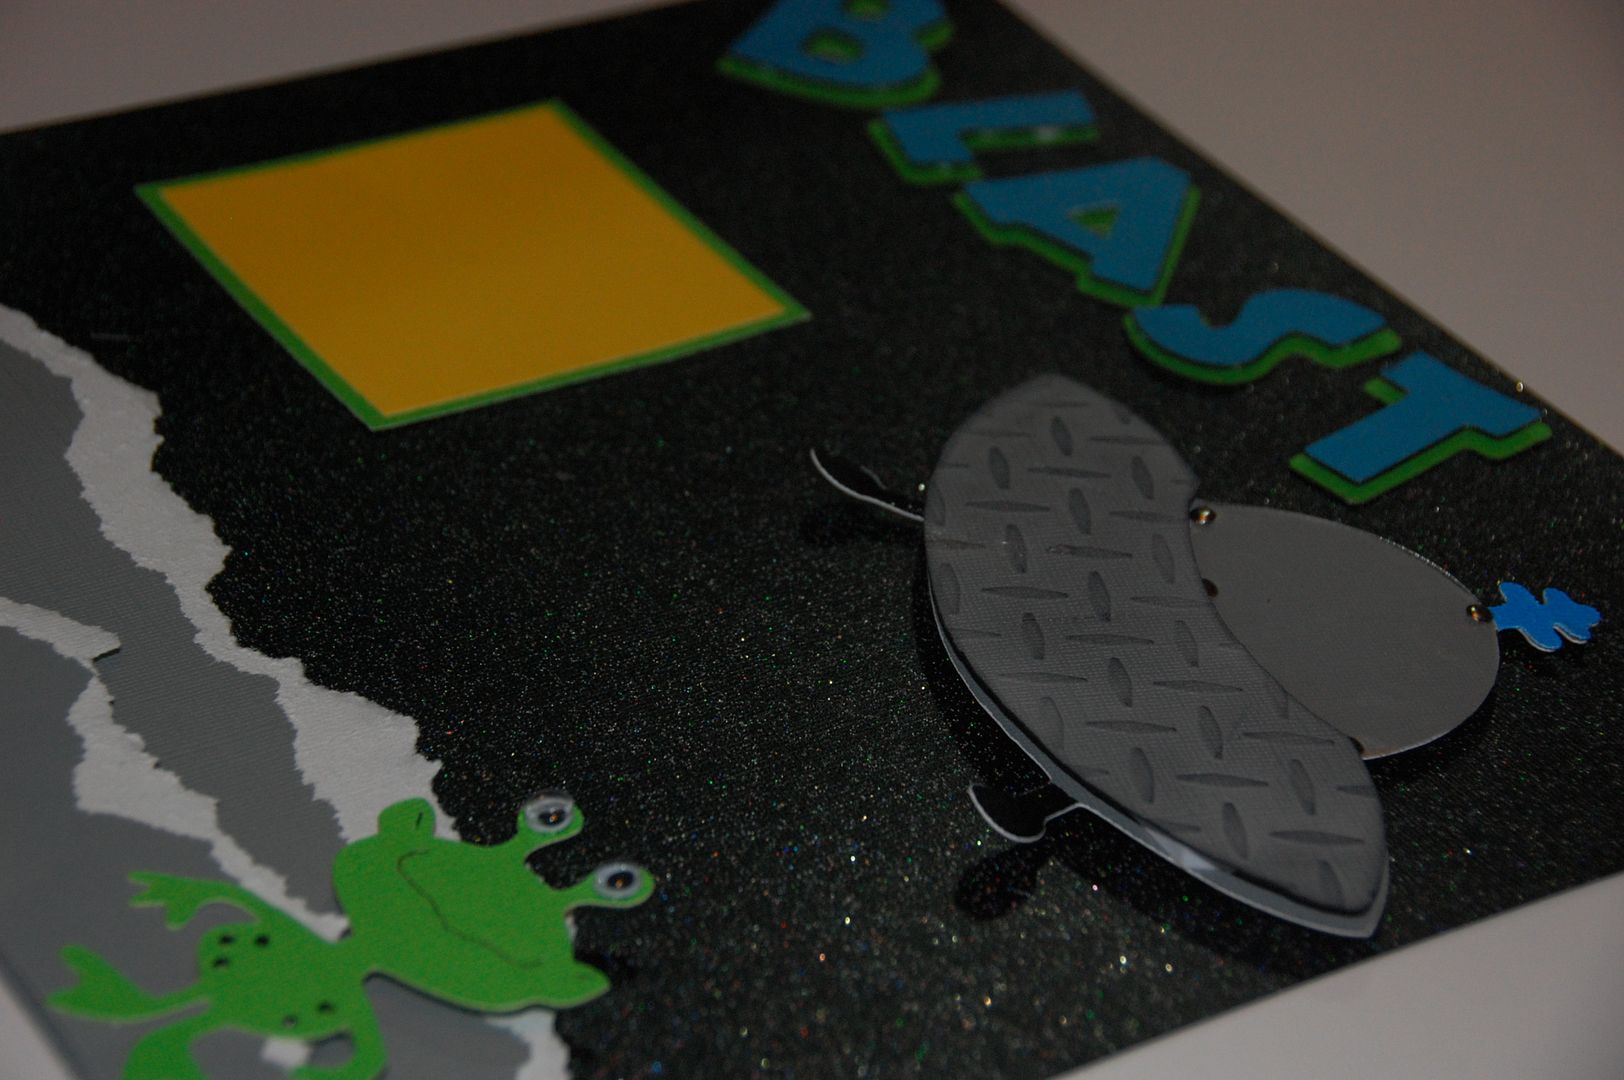
Don't you just love these little martians?! I think they have such personality. They have been cut at 3.29. To give some depth to the cut, I used Viva Decor Pearl Pen in Black for the "spots". I also used googly eyes (I love those!). To do the grimace, I used my Micron Pen and followed the scored cut on the image.
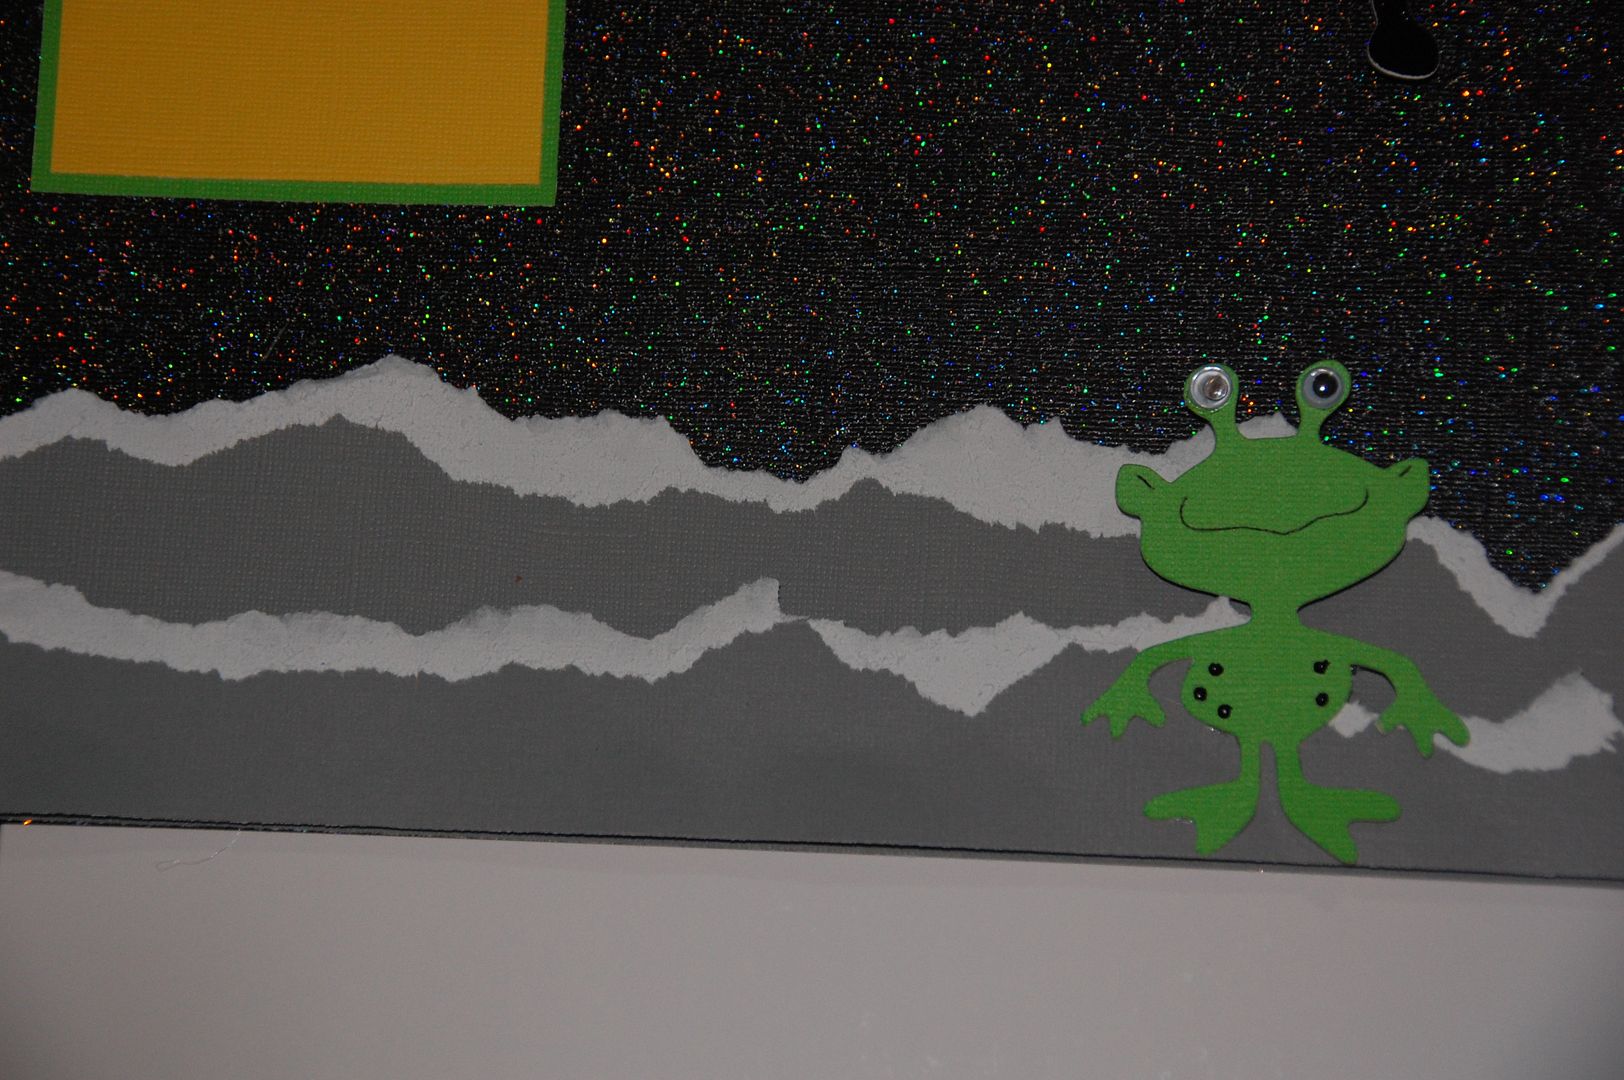
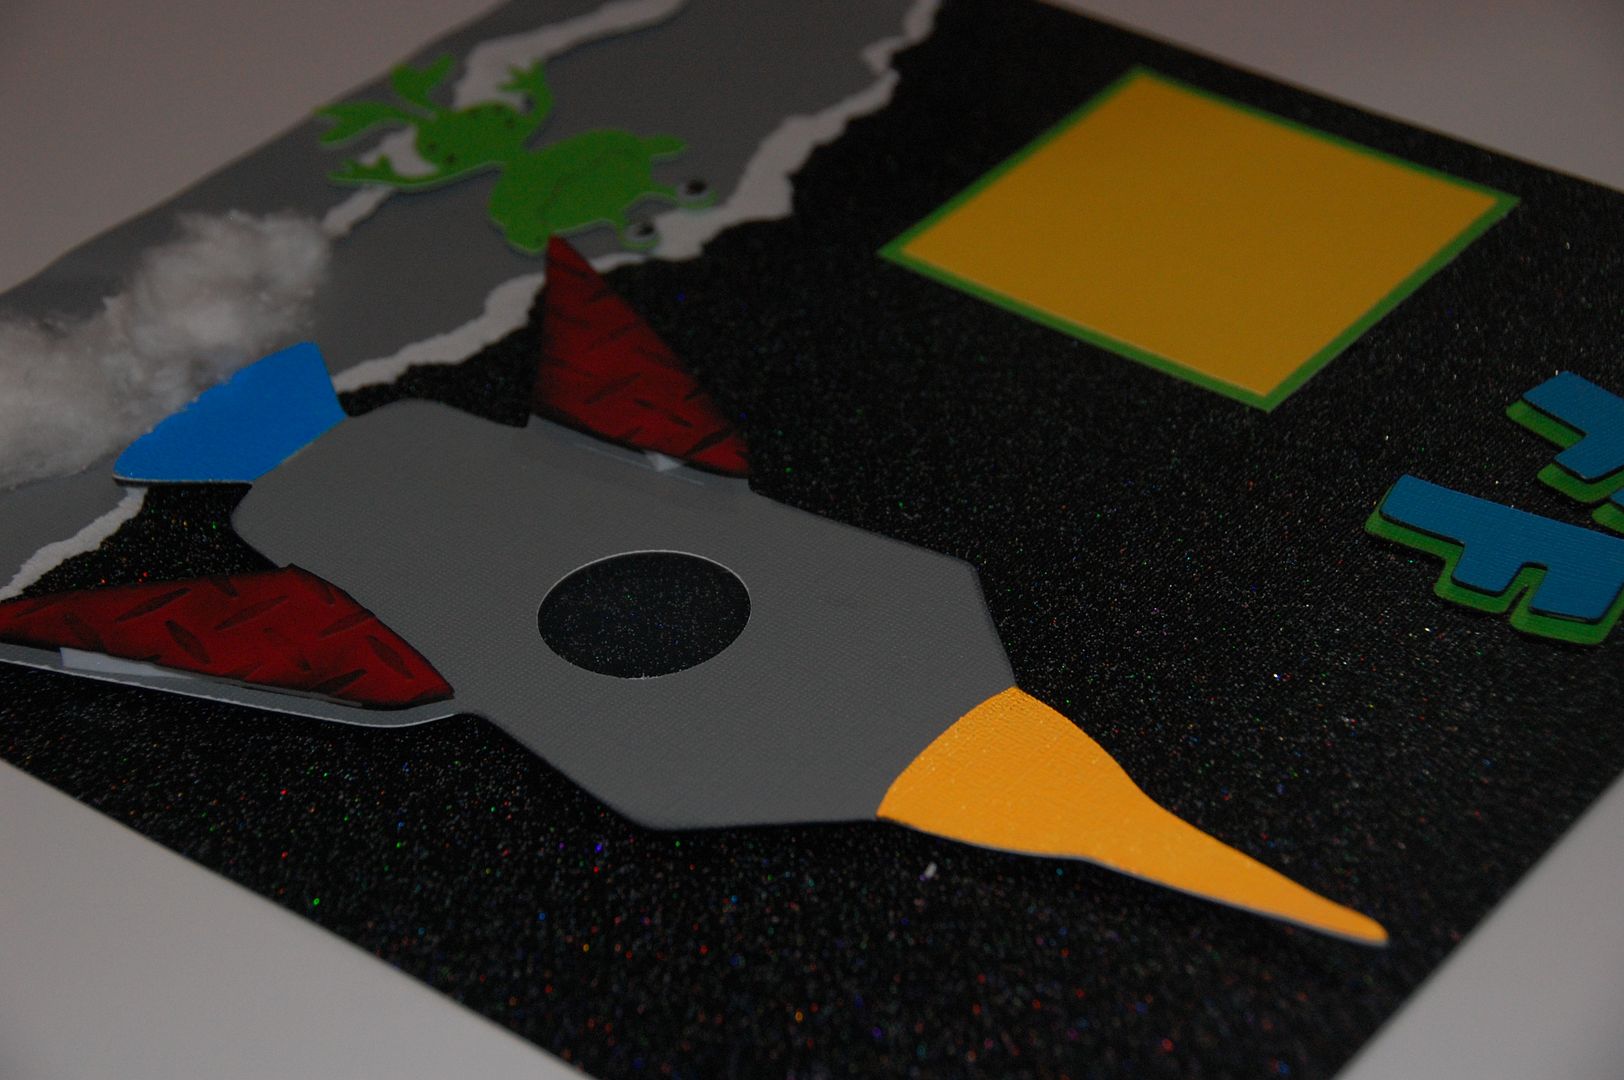
The moon surface was done with Coredinations cardstock (white core) and tore it to create a false rocky surface. I then tore a second layer that was much shorter. I pop dotted the top layer to give dimension.

The font is cut at 1.82 inches for both the layer and the shadow. I have to say this font looks better larger than smaller. The first time I cut it at 1.00 inches. It was too small and it was hard to see the "shape and angles" of the letters. I added pop dots between the blue and green layers. The letters have all been inked with Black Soot from Tim Holtz.
Now both the Spaceship and the rocket are from Everyday Paper Dolls. Since this cartridge does not offer layers for accessories, I thought I would share a quick video on how I do layered paper piecing with my Gypsy.
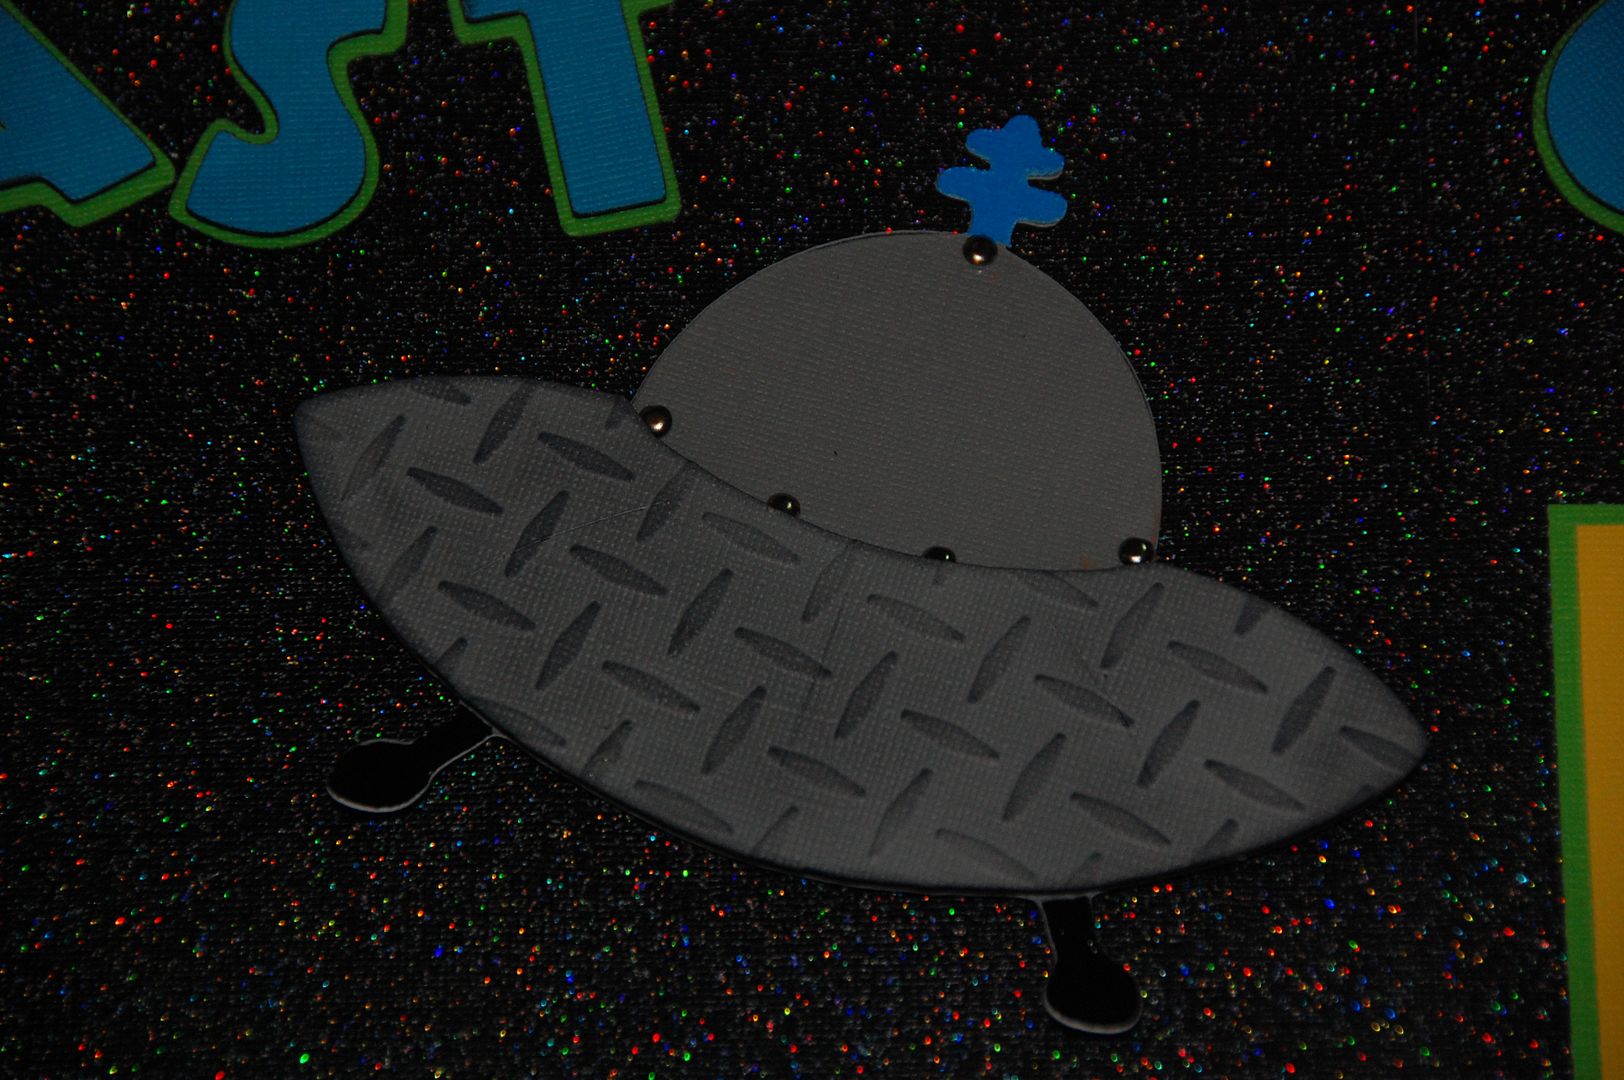
I can't decide which is my favorite . . . The rocket or the spaceship! To create the spaceship, I cut the image 3 times- 2 out of cardstock and 1 out of acetate at 4.86 inches. I trimmed the excess off the acetate to just get the "bubble". Then I took one layer of the cardstock cut and trimmed the body and the signal. The body was embossed with Cuttlebug Folder Diamond Plate and inked with Tim Holtz Black Soot and my foam applicator (To see how I ink the centers of images, Click Here). The signal was wet embossed with Zing Neon Blue. I then pop dotted the body and added brads to hold the acetate bubble to the image. I also used a brad to hold the signal to the top of the bubble.
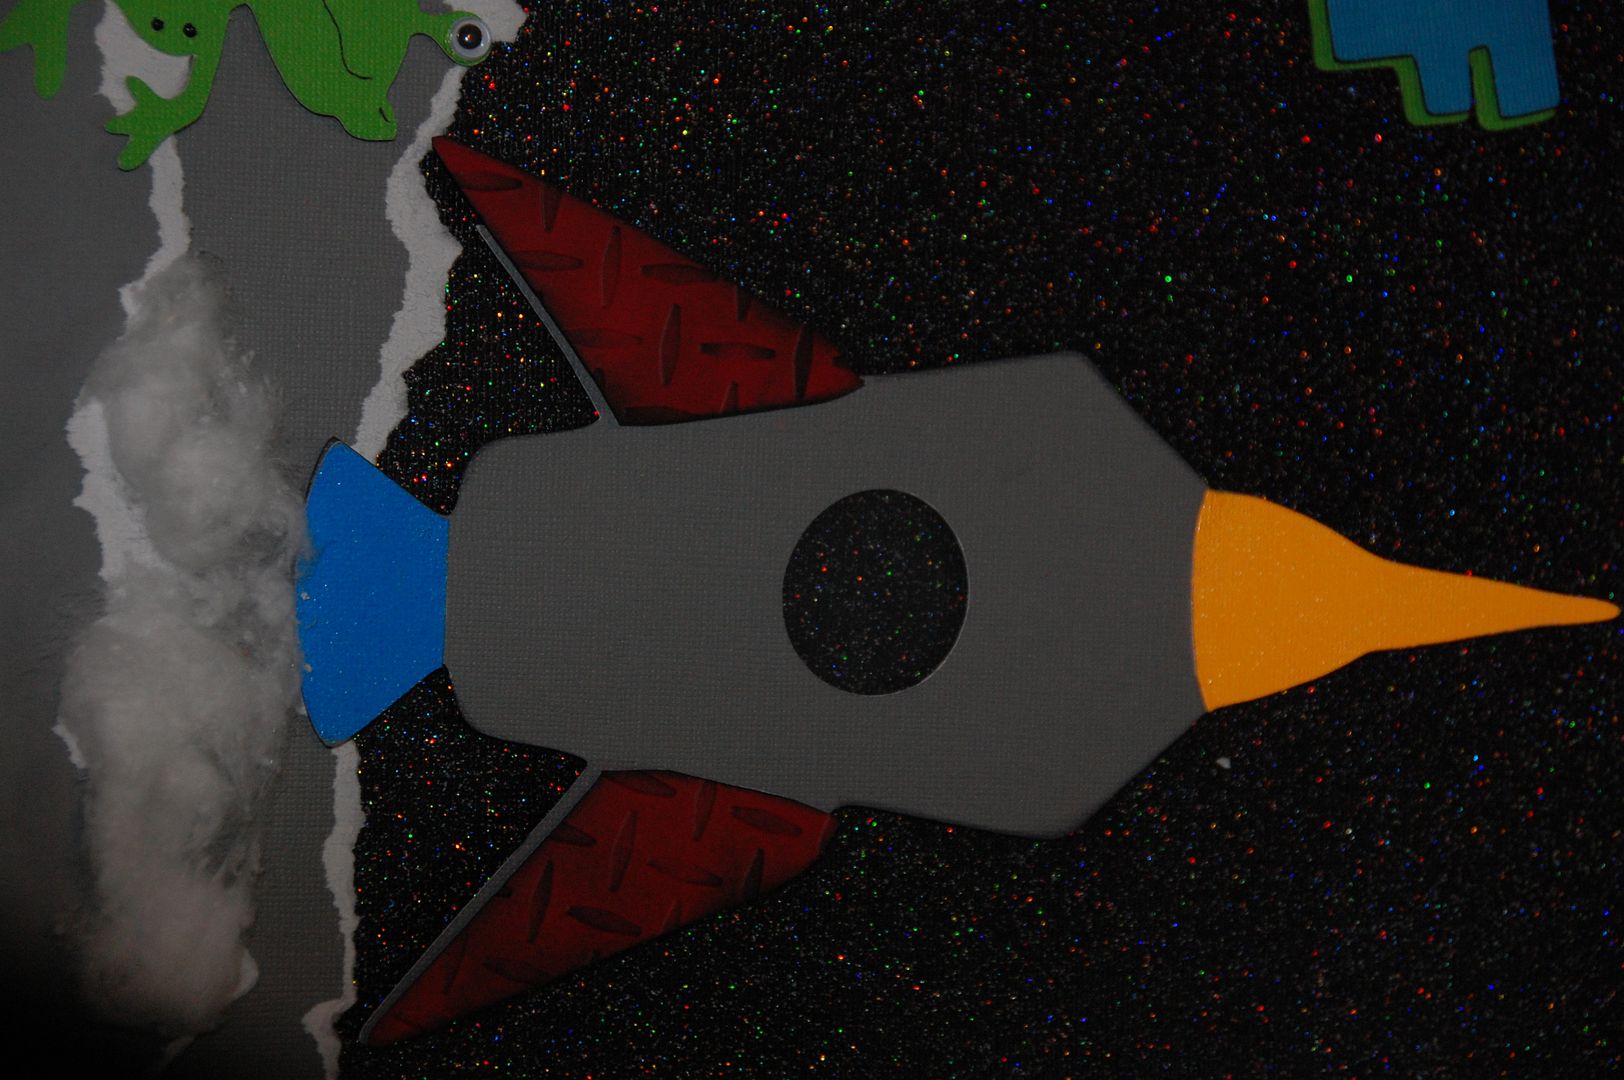
The spaceship is so much fun! It is cut at 9.57 inches. I cut the rocket body out of gray cardstock. I then cut the nose of the rocket and the base from gray cardstock. They have been wet embossed with Zing Neon Amber (Nose) and Zing Neon Blue (Base). Then using the piecing method from the video, I also cut the red wings. The window had been backed by acetate. I embossed the red wings with Diamond Plate Cuttlebug Folder and inked again with Tim Holtz Black Soot. The wings have been pop dotted to add more dimension.
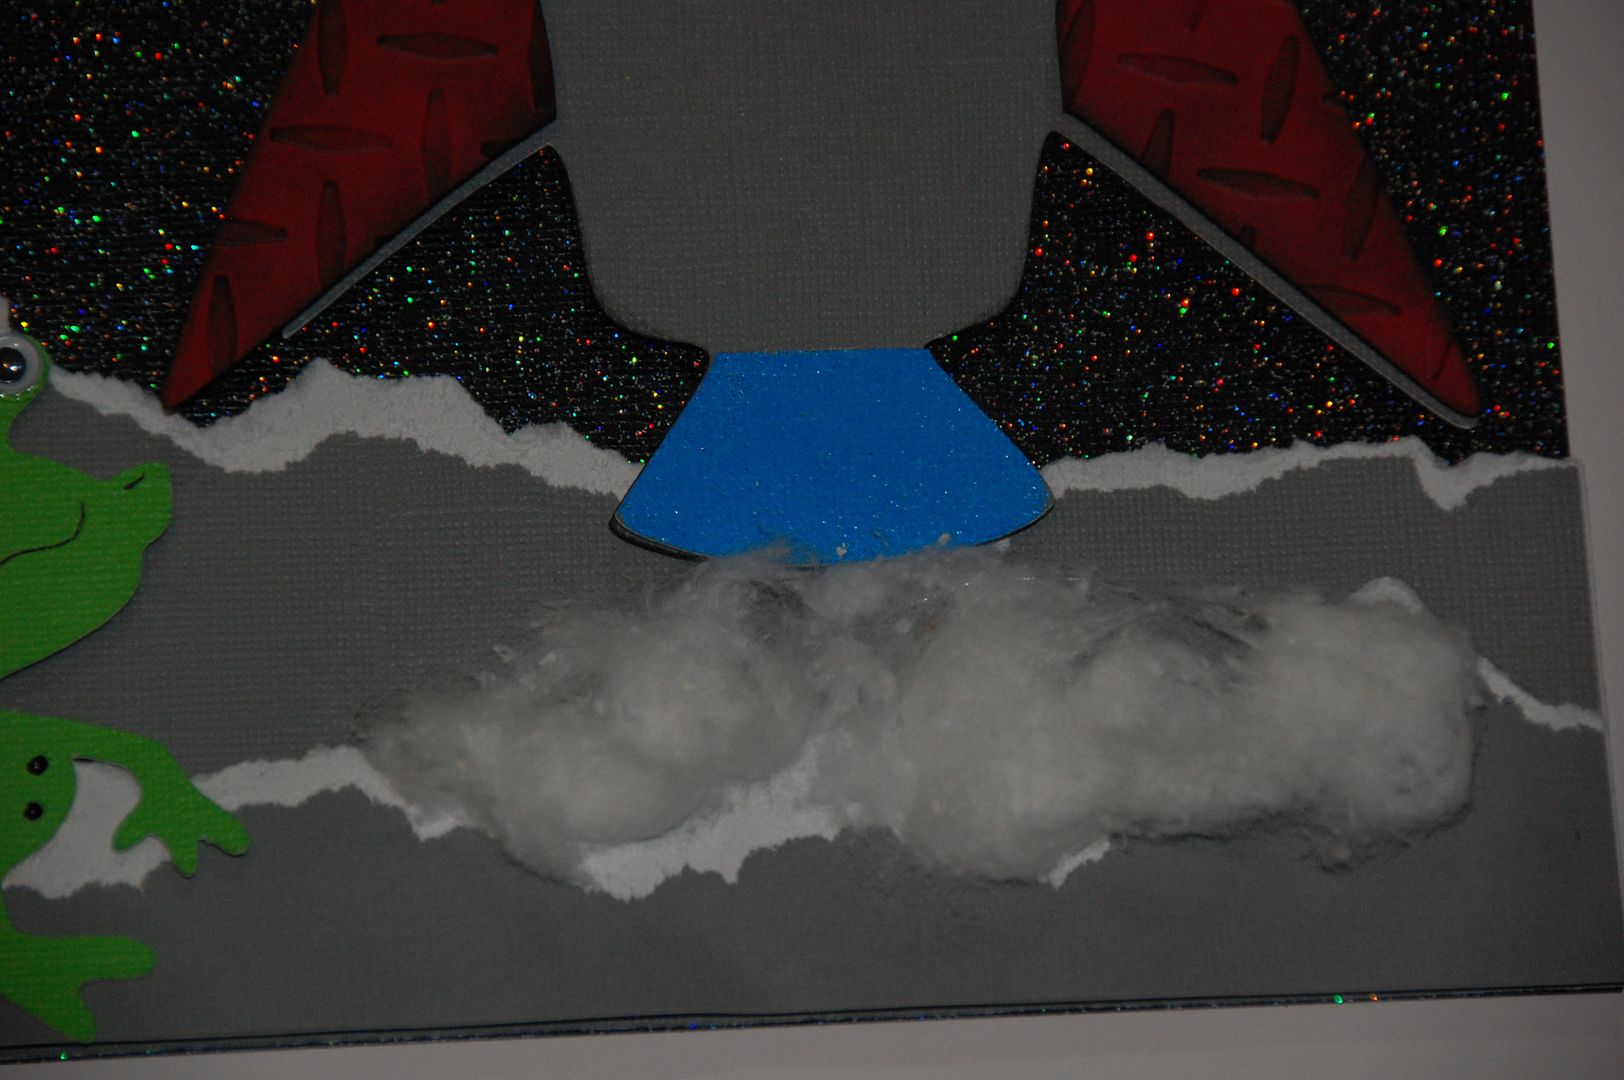
My final touch was to add some stretched cotton balls to the base to create the illusion of smoke.
The mats can hold 3x3 pictures. I used a ton of pop dots to give a more realistic feel the layout. I am learning that I love doing layouts because I can cut images bigger. I really had fun with the details of this layout. I hope you enjoyed it plus the video tutorial on layers.
Feel free to download free Gypsy file from my blog 217 Creations.
I appreciate all the comments and following here at The Bug Bytes and at my personal blog 217 Creations

I appreciate all the comments and following here at The Bug Bytes and at my personal blog 217 Creations

