f The Bugbytes: Well hey there, bday boy!

Welcome - Copyright & Disclaimer

Welcome to The Bug Bytes a site/blog mainly for Papercrafting and some photography and other stuff thrown in here & there. Add in some die cutting machine, scrapbooking tools, cameras, scissors , glue and...... My name is Pam. If you have been redirected from Papillon Digital Design you have come to the right place.Hope you get inspired by the projects, videos and files. Would love it if you could leave comments and become a follower. (Word verification is turned ON to avoid spam. Sorry for that inconvenience.) Would love it if you would also share your project here . If you find a linky under the post do share your project by posting link there or if you do not find a linky post your link in the comments.Thank you for visiting. The website Papillon digital designs has changed to Papillon Digital Design so if the link gives and error or takes you to page with chinese characters then please drop the 's' in the link at the end of papillondigitaldesigns and try . That is change papillondigitaldesigns to papillondigitaldesign and try the link.

July 7, 2013

Well hey there, bday boy!


Hi all!  This is Melody from A Splash Here and There blog. Thanks Pam for letting me share my project with the Bugbytes readers once a month!  Today I'm sharing a boy's birthday card I created for my nephew who just turned 5 a few days ago.  This project was designed using the Silhouette Studio and cut with my Cameo. 

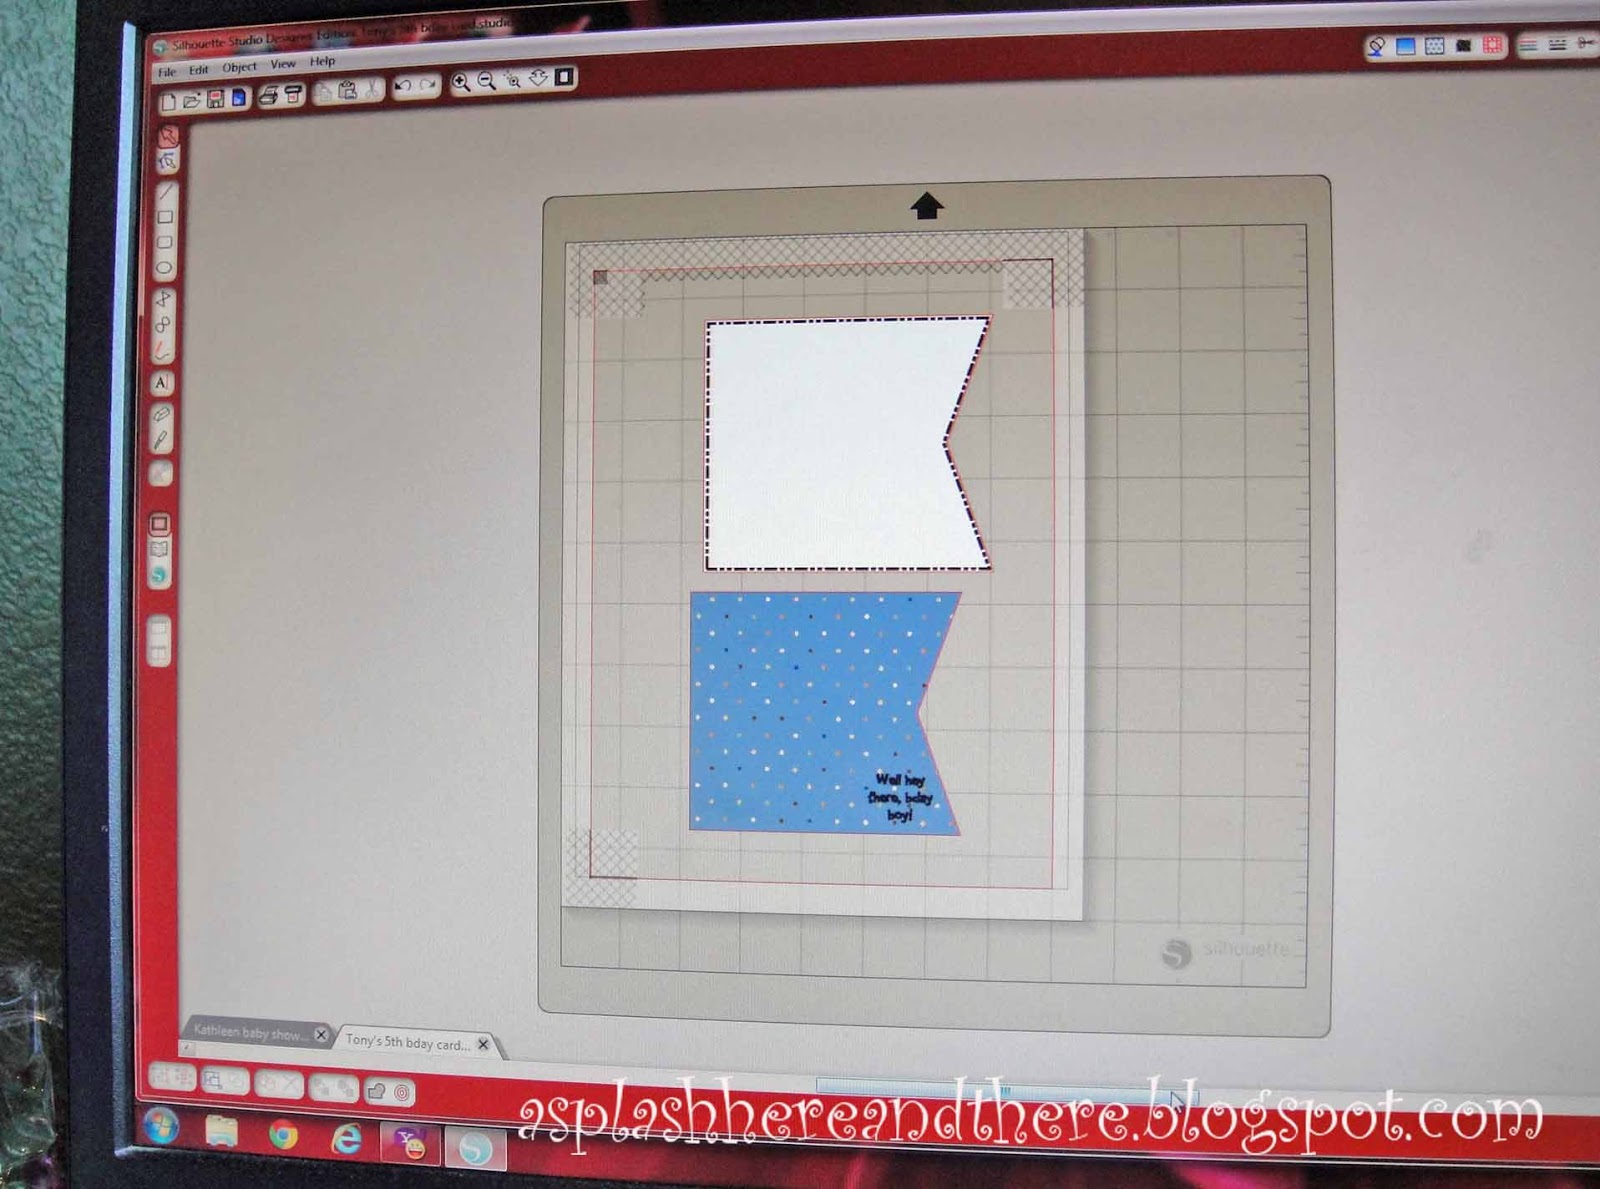
The base of the card is a pennant card by Lori Whitlock (Design ID #44887).  I used the internal offset feature on the front layer (in white) to create the faux stitching in black ink.  Then I filled the top layer of the card with the journey dot pattern by KI Memories (Design ID #22078).  I used the Happy Sans font for the sentiment in the front, set the sentiment to print only, flood-filled in black ink.  Below is a screenshot and the page before cutting (I'm using a Cricut mat on my Cameo).


I used the internal offset feature to create the sentiment on the inside of the card (Happy Sans font), as well as the faux stitching, this time in blue ink.  The knight image is a print and cut png purchased from Lettering Delights.  Below is another screenshot and the printed page before cutting.

 
I wanted a layered look for some dimension so I
printed 2 of the knight image.
 
 
And here are some closeups of the final card.  I added some twine too. 


Thanks for stopping by! 

1 comments :

Karon said...

WOW fabulous card!! Something I still haven't tried, the fill buttons and the internal offset button - hmmm see a play coming on. TFS

"kind encouraging and inspiring words"

I appreciate your comments so much. They are treasured and such an inspiration. Thanks for leaving them.