
 Hi all,
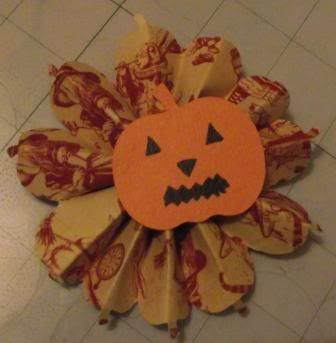
It's Kelly from http://www.kamscraftyplace.blogspot.com/. Today I'm a guest designer for Pam. Thank you for having me back again. The theme this month is Halloween. I thought I would make a pumpkin rosette. I made a rosette on my Gypsy the other week and I wanted to try it again but instead of circles at the top I used pumpkins.
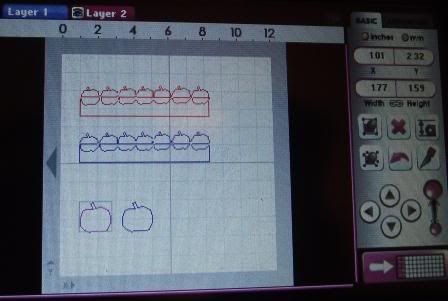 Here is the Gypsy screen of the file. As you can see I placed pumpkins along the top. I didn't put any on the bottom as a previous reader on here pointed out I didn't need to. I think I just got too excited placing them on.
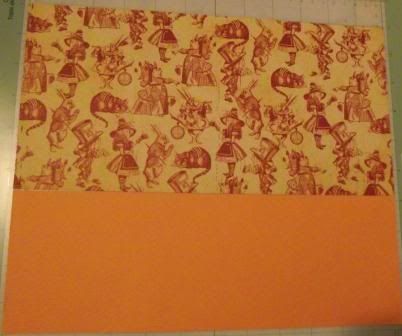
I used the Graphic 45 Alice in Wonderland halloween card and Orange card
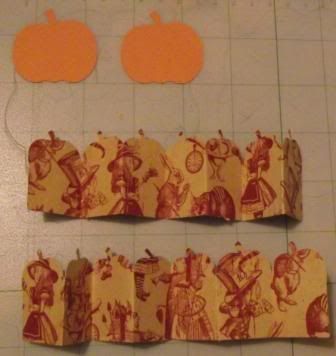 Here it is cut out. As you can see I folded it on where the pumkin ended. After a bit of playing I had to also fold it down the middle of each pumkin. If the pumpkins were smaller it would be alright, but I don't think you would realise they were pumpkins if they were smaller. You then need to attach the two pieces together to make a ring. you then push the bottom in whilst pulling the top out. The pumpkin keeps the rosette in it's shape. There is one on each side. If you don't have something in the middle the rosette pops out of shape.
Here is the finished one. You can see how I've folded it a bit more detail. I would probably change the colour of the pumpkin in the middle when I do it again. The rosettes are a bit addictive once you have the basic file. I will be uploading this file Wednesday pm onto my blog. You'll be able to find it under the heading Gypsy files at the top.
I hope you enjoyed this project.
Kelly:)