f The Bugbytes: January 2011

Welcome - Copyright & Disclaimer

Welcome to The Bug Bytes a site/blog mainly for Papercrafting and some photography and other stuff thrown in here & there. Add in some die cutting machine, scrapbooking tools, cameras, scissors , glue and...... My name is Pam. If you have been redirected from Papillon Digital Design you have come to the right place.Hope you get inspired by the projects, videos and files. Would love it if you could leave comments and become a follower. (Word verification is turned ON to avoid spam. Sorry for that inconvenience.) Would love it if you would also share your project here . If you find a linky under the post do share your project by posting link there or if you do not find a linky post your link in the comments.Thank you for visiting. The website Papillon digital designs has changed to Papillon Digital Design so if the link gives and error or takes you to page with chinese characters then please drop the 's' in the link at the end of papillondigitaldesigns and try . That is change papillondigitaldesigns to papillondigitaldesign and try the link.

January 31, 2011

Toy Story on Ice 2 Page Layout

Hello everyone - this is Amy with redwolfscraps.  Thank you again Pam for allowing me to be a designer.  I have been doing a lot of layouts - but must admit I havent been using my Gypsy or Cricut very much :-(  This past fall I bought tickets to Disney on Ice - Toy Story 3 for my son, my 2 brothers and myself (it was a suprise that both my brothers were coming to visit at the same time!!) - So of course I had to get the Toy Story cartridge :-)  I have many pics of the event - and lots of layout plans - but here is the first one.

Here's the cartridge:

I took some of my sons army men and matched them up with my American Crafts Cardstock.

I preplanned my layout on my Gypsy - but after a cutting mishap with the large army man (layers werent scaled the same, and clock was a tickin') you will see my final design is modified.

I make a new layer and layout all of the base layers

and another Layer for all of the layered pieces.  This way I can cut everything out of the color I need in one run.  The pieces were slightly larger than 6" or I would have cut all of them on the same mat.

Here's the finished 2 page layout - 

Page 1

Page 2

Detailed Photos - Title...I used some brighter cardstock and then took my white gel pen and doodled some hightlights. - PS If you dont have the uni-ball Signo broad pens - you need to make the investment.  I had picked up the white one on a whim at Archivers and LOVE it!  So yesterday I picked up the silver and gold at Michaels with the 25% off coupon!


The army men are layered and then all of the cricut cuts were highlighted with white.  I did the journaling with the silver.  I think the layout turned out very cute - cant wait to get my other characters together, but that is going to take some quality time with my cricut :-)

I hope you enjoyed the layout.  Thanks again Pam!

January 25, 2011

Valentine Shaker Post It Holder

Hi everyone! It's Allison from Goody Bag Diva and I am thrilled to be here for the first time at Tuesday Treats! Thanks so much to Pam for having me!Today I have for you a little Valentine's gift for your colleagues or maybe even to leave on that special person's desk this Valentine's Day.

This project combines two of my favorite things - a shaker card and a post-it note holder. It uses only two cartridges - George and Basic Shapes and this beautiful scalloped heart was a hidden treasure I found on Gypsy Wanderings.

I began with a rectangle from George - the first step was to unlock the width and height and turn on the real dial size button. Then I set the dimensions at 7.75 width and 3.50 height.  After cutting, I scored at 3.5 inches and 4.25 inches. I also used an exacto knife to make two little slits for the pen.


Then I began to work with the top layer of patterned paper that would have the heart cut-out. Before moving on to the heart, I selected another rectangle from George (and keeping Real Dial size on plus width & height unlocked) I made it 0.50 width and 3.50 height. Then I copy and pasted it three times, rotated two 90 degrees and formed a square with the four rectangles. In case that sounds confusing, take a look at the picture. Now don't forget to lock the width and height button before moving on!


The scalloped heart is under the tag function on Gypsy Wanderings (2nd row, 8th button). It is at 2.71 inches high, and I centered it to slightly overlap in the inner square formed by the rectangles. Then I welded all of the shapes and also grouped them.

For the center of my layer, I used the shift key which is the scalloped heart with a center cut out.

Then I used the hide contour feature to hide the scalloped line.


I sized it at 2 inches.

Then I moved it over to the center of my group. It does NOT need to be welded because I want the heart to be cut out.


And just to make sure I was doing it correctly, I always check with the preview button.


The final step before assembly is to cut out a final top layer in red of the scalloped heart with the center cut out the same size as my original heart (2.71 inches). I also ran it through my Cuttlebug using the Swiss Dots folder.

For my layer of clear plastic, I use the clamshell from my cricut cartridges - whenever I get a new one, I simply cut apart the clamshell and save the pieces of plastic. They are perfect for shaker cards! I just cut a square at just under 3.5 inches high using my paper trimmer. Then I adhere it to my top layer suing ATG tape and then back with Scotch two sided foam tape.

Then I carefully fill the center with some Martha Stewart heart glitter, peel the plastic off the tape, and lay down the front cover of the holder on top. Don't forget to add the top outlined heart layer to the front.

Then I added a little pen I picked up at Walmart and adhered pink post-it notes to the inside and my little gift is ready to go!


I would be happy to share the gypsy file with anyone who wants to send me an email. And although it is a little early, have a Happy Valentine's Day!

January 24, 2011

And the Winner is!!!

The winner for the short and sweet blog hop is
Nana's Paper Things who said...


"Pam, such a beautiful card! I didn't know those cuts were on that cart?!?!! Thanks for sharing and for the give-away!


LizW"

Congratulations
I have sent you a mail my dear hope it went to the right addy. If you have not got it send me an email with your address and I will have the package on the way. Have to ask my hubby to post as I am not yet mobile but will be posted within this week :).

January 22, 2011

Welcome to the Short and Sweet Blog Hop -Heart of Gold

(note: Giveaway has ended & the Winner has already been picked for this on Monday )

Welcome to the Short and Sweet Blog Hop  thanks to Elizabeth - 217 Creations!!


Thank you for dropping by from Wendy's blog - Bling Queen http://lvscrappin.blogspot.com/ in this Valentine blog hop. If you have come here straight your journey will be much more interesting if you start at blog hop beginning http://www.217creations.blogspot.com/ - 217 Creations by Elizabeth. That way you can enter for lots more giveaways.
Oh yes there is a giveaway in this blog.
I am giving away a SweetHeart Cricut Cartridge.


Details on how to enter are at the end.
 
Well now that - "That" is out of the way. Here is a small project for Valentine. I decided to give away sweetheart - as of the 4 main cartridges which we can use for Valentine I love this and love struck the best . Wedding day and tie the knot comes second place to me.

Here is a simple project with Sweetheart cartridge to show you the possibilities...


and inside


Most of the shapes are from the Sweetheart cartridge. Yes Sweetheart is not just for the young but for the old too. Many images like the photocorner and the swirled heart are lovely and we have some lovely folder options too. Well I have used mine as  folder to put a gift card (inside top) in but that can be easily adapted as an envelope. The word valentine though is from Love Struck.
I use Plantin card and envelope feature most of the times. I keep some basic sizes all ready as template in my gypsy. So I just open that and first thing I do before I forget is to save the file with a newproject name. ie here I named it valentinesweetheart.gypsy. That was I make sure the original (which I name for eg as Card5dot5x4dot25.gypsy - ie the dimensions named in filename).
This card is just a simple card with no welding but just a little adjusting by unlinking the golden chain and playing with width and height so that the pink heart can outline the scalloped one and so on.  I then used gold foil pen, sharpie and souffle opaque markers for some doodling and inking.
Hope you liked the simple project. For your chance to win the giveaway - sweetheart cricut cartridge - please leave comment by Sunday midnight Central Time (leave a way for me to contact you) in this post
I will pick a winner on Monday by Random Generator. And do not worry if your comment does not appear immediately. The comment moderator is set on so as soon as I see them I will approve and I am on the computer a lot :)
And be sure to stop by next at  Steph's place - Love To Create Cards - http://lovetocreatecards.blogspot.com/ .

Happy Valentine!!!

Hugs
Pam

January 20, 2011

Gypsy tips - For Welding right play with grouping order - yes even with welding inside solids as we call it

Grouping order makes a big difference in welding.

Nowadays even welding inside solids (as we call it oppsed to welding inside frames) is possible in most cases with tweaking of the grouping order. I think this was possible after the double digit version updates as earlier it was not possible in about 80% of the cases. Still not possible in CDS I think.
I keep telling you folks check the grouping order and yes that pays out.
I know I have not posted in a while and thanks to Fittertwit am posting this.
(at present the firmware portion is 0206) unless you have the imagine beta testing version I think. )
for those who are wondering what is solid and what is frame
when you want say a square inside a square - if the cartridge itself has that figure ie pushing one image button gets you that image then it is a frame.
for eg in gypsy wanderings if you press the 2nd creative feature (1st row 2nd button) with shift also selected it gives the frame option


just the creative feature without the shift gives just solids like a square or rectangle etc.


So here the one on the right is what we call a frame


I had just rearranged the solids (as I call it) to show better
actual way I want this is as shown below


Now when you weld a phrase inside frame you get 99% success
but try welding a phrase say smile to the inside of the small square which is inside the big square. with smile showing then unless when you play with the order you will find success more now.
try in this case grouping the squares first and lastly the crown.

here are pics to show you

see how the weld has gone wrong when I weld the phrase smile -look at the weld in  the top left solid one vs the frame weld on the right


Hmm
now to undo when such mistakes often is to first (after taking off preview of course) press the unweld key


and then the ungroup


Now in this case what worked was grouping the phrase last and then pressing weld-
here are the photos showing that


So hope you enjoyed this tip

January 19, 2011

Pinwheel Quilt Layout

Hi everyone one this is Beth from thunderbirdlindybydesign.  As some of you know I love quilts, all kinds of quilts.  I love making them, seeing them in quilt shows, etc.   I love the intricate stitching of hand quilted quilts, and the beautiful designs of machine quilted quilts.  One of my favorite quilt patterns is the pinwheel.  I picked a quilt up at an auction several years ago that had a white background and colorful pinwheels all over it.  I used this quilt as my inspiration for a scrapbook layout I made of my daughter's first day of school.

I started with a triangle on my gypsy, and skewed it so the length was more then the height.  I then copied it and placed it in a pinwheel pattern, grouped that and copied it 8 more times. The original pinwheel itself was a little less the 3 1/4" when it was grouped, so I ended up with 9 3 1/4" pinwheels on my gypsy. I then cut it out of a off white piece of cardstock.  I then chose 9 different brightly colored pieces of card stock cut to 3 1/4" x 3 1/4",  and glued them behind the pinwheel cut outs.


Using the Wall Decor and More Cart I cut the clothes line by approx 7 1/4 x 1 1/2 both the shadow and the clothes, inked them, and layered it with pop dots.


Using the Bloom lite cart I cut the Gate and the fences at approx 4" tall along with the shadow and the flowers, inked the images, and pop dotted it to the background.


Here is the finished Layout.  I layered my 4x6 pic on a 4 1/4 x 6 1/4" cardstock, and then layered that onto another one.


Thanks Pam for having me as a guest designer this week.

Beth

January 18, 2011

Hey Fish Lips!

Hi!  My name is Michele from greengirlscraps.  This is my first time on Tuesday Treats and I am very excited to be here!  I wanted to share something that I do for titles and other words on my pages.   Often times, I want to use my Cricut fonts but I don't want to deal with gluing all of those letters down!  So I'm going to show you what I do instead.
This layout is from one of our many fishing trips last summer.  My family LOVES to be on the boat.  Our youngest daughter is 1.5 at the time and we taught her to kiss the fishies before we toss them back.  Sometimes she would do it and sometimes she wouldn't, but it was always fun to play the game! :)

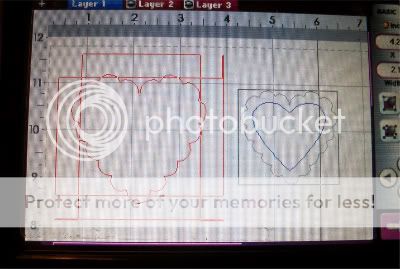
First, I design my titles on my Gypsy.  Here you see that I created my title and my two sub-titles, I'll call them.  This font is Pooh Font, Marker style.

I make sure when I type out my titles that I type the entire thing at once:  "Hey Fish Lips!".  This is probably the only time I ever use the space key on the Gypsy but it really helps to keep everything lined up.  I then use the kerning and the arrows to move everything to be perfectly spaced.  For this particular title, I also slanted it 0.20.  I've found that when you slant your letters, you have to go back and fix the spacing more often. 

Here, the yellow highlighted circle is showing you the tilt of the letters at 0.40.  These will form the corners of my page.

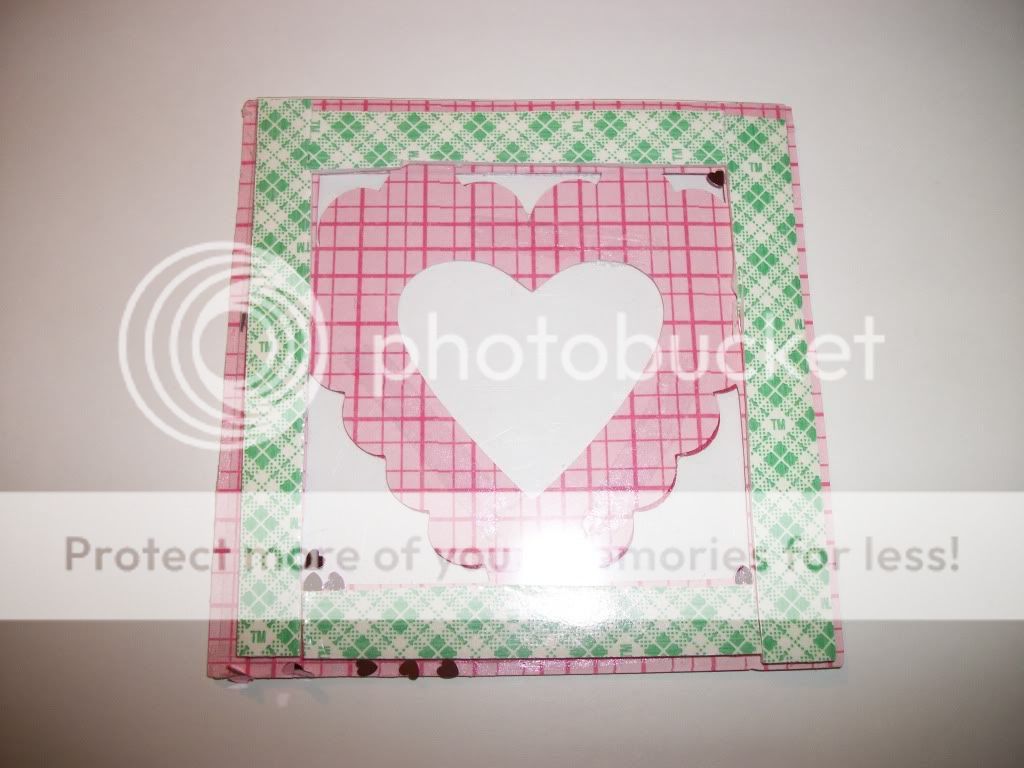
Then I cut it out!  So that I don't have to deal with all of the letters, I use the negative cut.  It's so much simpler to deal with adding in a few dots for the O's and A's, rather than worrying about getting the title straight and correctly spaced out.  I know this won't work for every layout but for some, it's perfect! I cut this with my Imagine, as I find the cutting is so much more accurate.  Here are the letters cut out (which I won't be using):

And here is the negative cut that I will be using!

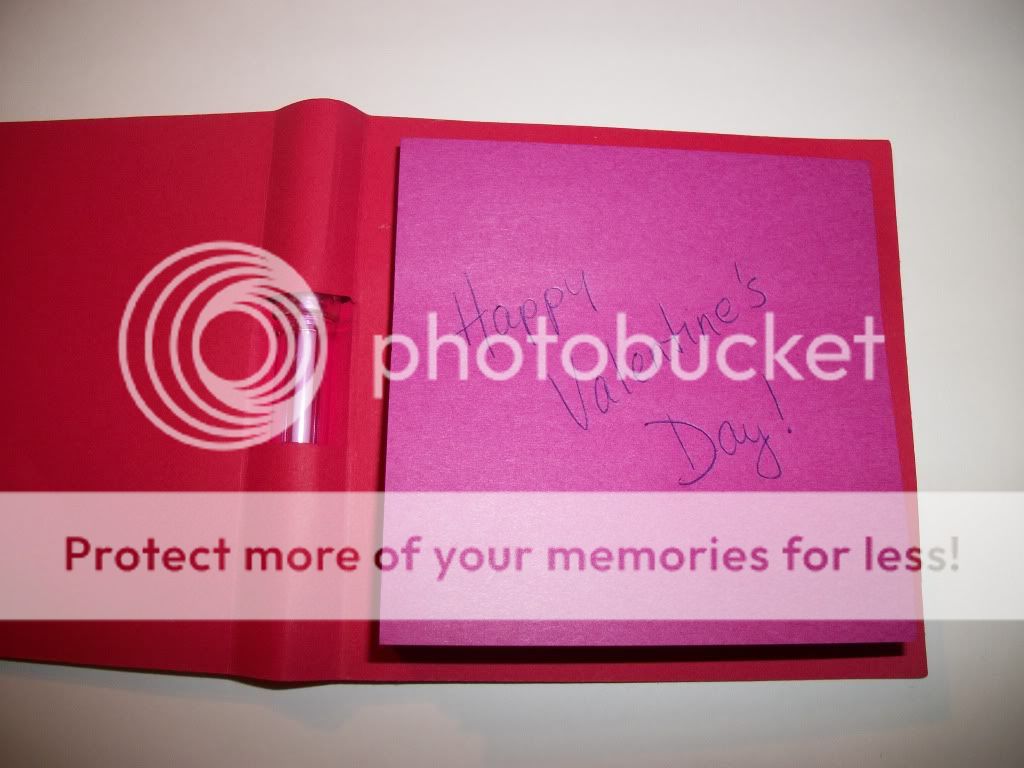
I chose another paper to glue to the back so the letters are still another color/paper choice.  Here you can see the back of one and the front of another. 

One more Gypsy item that I'm sure most people are aware of but if you are just cutting with the Imagine using the Gypsy, you can still place the paper wherever you want on your mat.  Here I put my Gypsy in the middle of the mat to show you how I lined up the layers of the fish I was cutting and the fishing pole (both from Camp Out Solutions cart).  Like I said before, I think the Imagine cuts with more precision than my Expression and I love it! 

 From there, it's assembling the layout as you normally would! Here are a few details of my project.

I tore the title and subtitle paper to make it not so linear.

I used Glossy Accents on the fish to give it some dimension and some slimy scales of course!

I wound fishing line around my fishing pole and, although it's hard to see it in the pictures, the line goes from the pole and catches the fish's mouth!

Here's the picture of the full 12x12 layout again.

Thanks for visiting Tuesday Treats and reading my first ever post here!  I'd love to hear any comments you have!

Thank you,
Michele from greengirlscraps