f The Bugbytes: First Haircut Layout - and first post!

Welcome - Copyright & Disclaimer

Welcome to The Bug Bytes a site/blog mainly for Papercrafting and some photography and other stuff thrown in here & there. Add in some die cutting machine, scrapbooking tools, cameras, scissors , glue and...... My name is Pam. If you have been redirected from Papillon Digital Design you have come to the right place.Hope you get inspired by the projects, videos and files. Would love it if you could leave comments and become a follower. (Word verification is turned ON to avoid spam. Sorry for that inconvenience.) Would love it if you would also share your project here . If you find a linky under the post do share your project by posting link there or if you do not find a linky post your link in the comments.Thank you for visiting. The website Papillon digital designs has changed to Papillon Digital Design so if the link gives and error or takes you to page with chinese characters then please drop the 's' in the link at the end of papillondigitaldesigns and try . That is change papillondigitaldesigns to papillondigitaldesign and try the link.

March 18, 2011

First Haircut Layout - and first post!

Hi everyone! This is Allison from Goody Bag Diva and I am thrilled to be joining the team here at TheBugBytes (well....you can add terrified to that as well). I wracked my brain trying to decide what I should post and after much thought (and freaking out) I decided to stick with my my comfort zone and go with a layout.

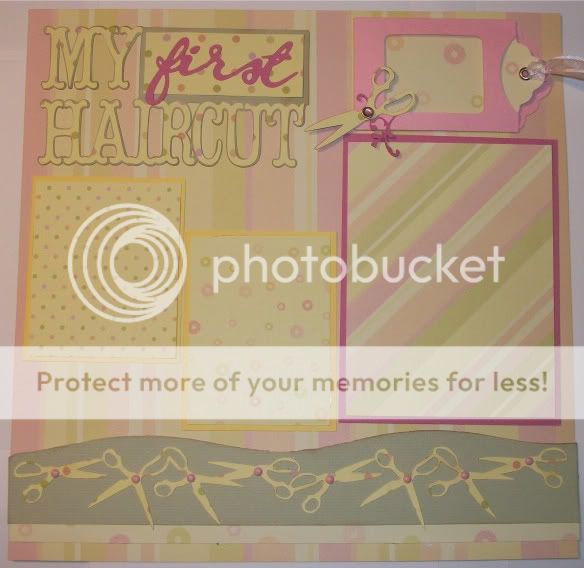
As sad as it makes me, it is getting to be time for my little one to get her first haircut! The back of her head is full of curls, it seems to be growing up and around instead of down, but those bangs of hers are definitely ready for a trim!


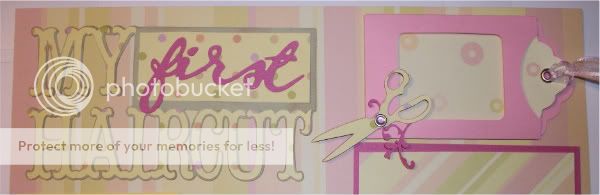
close up of the header:
close up of the footer:

The details:

The printed paper is from K & Company Brenda Walton's Small Wonders Girl Stack and Mat Stack, while the plain colors are Bazzill and Recollections cardstock. I am trying to use my K&Co paper instead of just hoarding it ( it is tough to cut up that pretty paper), and I decided to stick with one stack here so I didn't have angst over coordinating paper patterns.

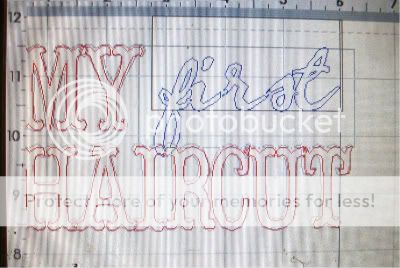
This layout is a perfect example of why I love my Gypsy - it let me plan the design for the layout and get everything ready to be cut so it took no time at all to assemble. I began on Layer 1 with the Shadow Font on Storybook at 1.5 inches for the title block. I nudged and welded the words "My" and "Haircut" together first and then arranged them with a rectangle from George that was 3.70 inches and rotated 90 degrees.

I needed to make sure my top layer of text fit the shadow I had created so I added a Layer 2 and kept the eyeball "open". Then I used the regular font from Storybook at the same size and made sure as I nudged and welded the letters together that they would fit over the Shadow layer.

I wanted a fancier font for the "first" so I used Gypsy Font and welded it together. I kept the other layer visible so I could make it an appropriate size, which ended up being 1.60.


Next I knew I wanted a tag and a tag pocket - as my plan is to put her little locks in a bag and attach it to the tag so that it can fit but still be visible. I created a third layer for my tag cuts but kept that title block still visible so I could see what size to make it. Tags, Bag. Boxes, and More not only had the perfect tag but the tag pocket with a window in it! The tag is cut at 4.10 the tag pocket is 8.00. I put them both on the same layer so I could make sure that my tage would fit in the pocket the way I wanted it to. I did end up changing the direction of the tag from what I had orginally planned but it still fit - so I made it work!

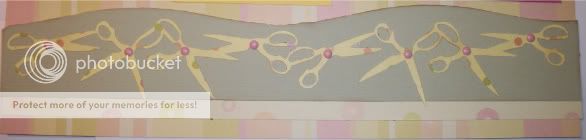
And for the last touch I wanted some scissors. I found both a fancy pair scissors (cut at 2.50) and a great scissors border (cut at 1.80) on Wall Decor & More. I welded two of the scissors borders together and again used the gypsy to make sure that the border would fit on the page.

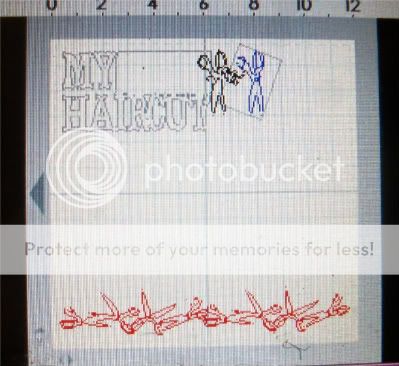
Once all my cuts were planned it was just a matter of deciding what papers to cut them with. I did a little bit of inking, which is where the extra rectangle in the title block came from. I hand cut that to cover up my over-zealous inking - oops! I added pink brads from Oriental Trading to my scissors border and gem brad to the fancy scissors.

My first post is done! Whew!  If you are interested in the gyspy file just send me an email. I do hope some of you will take the trip over to visit me at Goody Bag Diva - otherwise I will see you next month!

10 comments :

Dakota Bear said...

A very cute layout. You did a very good job with your first time as a guest designer. You used some of my favorite cartridges and like you I love to use my Gypsy to plan my LOs and cards.

Unknown said...

Very cute! Nice job.

Happy Mofe said...

Love it Allison.

AllisonF (Goody Bag Diva) said...

thanks so much ladies!

scrapnlifeaway said...

allison your layout is adorable!!! I am currently working on a scrapbook for my new grandaughter who is due to make her first appearance any day now!! This layout is so inspiring for me to "scraplift" for her book!! Thanks and nice job on your first post!!!

Karen said...

A very cute layout. Love the tag pocket with the window! I wish I had that cartridge.

Audrey Frelx said...

Very nice layout, Alison!

papillon digital design said...

This is awesome. I am enjoying this layout from Dallas.

Suzy-Q21 Crafter said...

Love the layout! Still trying to get the hang of making a layout with my Gypsy...you have done a great job!!!!

Nadia (WithGlitteringEyes.blogspot.com) said...

Awesome LO!!! Great composition and colors!

"kind encouraging and inspiring words"

I appreciate your comments so much. They are treasured and such an inspiration. Thanks for leaving them.