
Hi all,
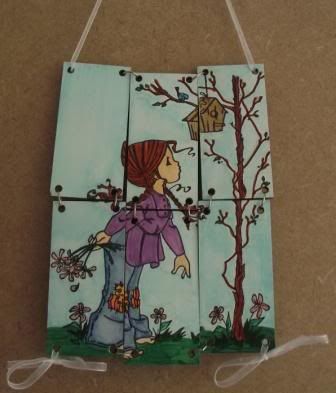
Today I thought I would introduce you to stampbord. I made a wall hanging with it and thought you may like to see how I did it. Thanks to Pam at for having me today.

Stampbord comes in all different sizes. It's white on one side which is the surface you stamp on.
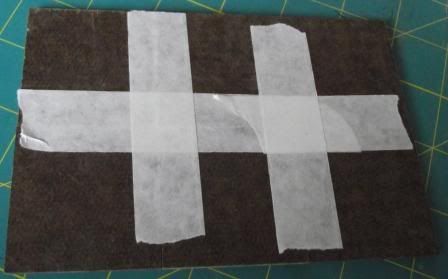
When i'm making a hanging. I choose which bords I'm using and how many I need. I turn them over in the configuration I wanted and fix them with masking tape. This is just to make sure that when I stamp an image they don't move.
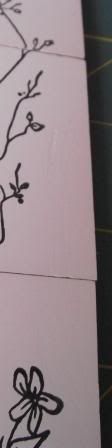
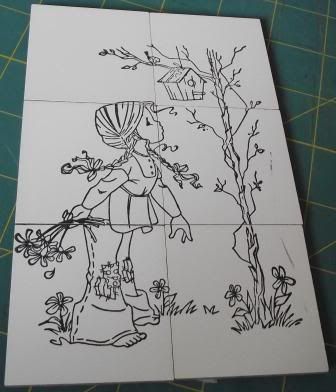 I then stamped the image. As you can see to the right I've caught the edge of the stamp. But that doesn't matter as this is what's fab about Stampbord.
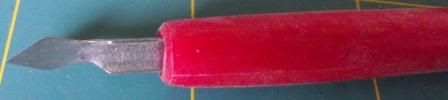
I took this tool. I can't remember what it's called but you can get them in the scratch kits for children.
 I then scraped the top surface off where the black line was. The bord has lots of layers so if you make a mistake you can erase it. I then coloured the image in with my promarkers. I then used my bigbite to punch holes in the corners. I attached it with jump rings and put some ribbon in the bottom corners.
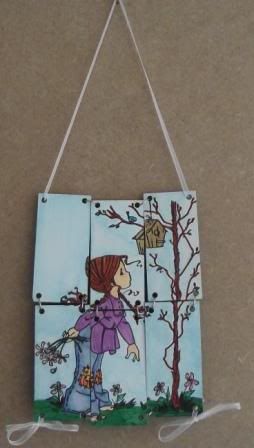
I hope you enjoyed this quick tutorial and will have a try on the stampbord. You can use all sorts of mediums on it.
Thanks for looking.