f The Bugbytes: Mono Colours

Welcome - Copyright & Disclaimer

Welcome to The Bug Bytes a site/blog mainly for Papercrafting and some photography and other stuff thrown in here & there. Add in some die cutting machine, scrapbooking tools, cameras, scissors , glue and...... My name is Pam. If you have been redirected from Papillon Digital Design you have come to the right place.Hope you get inspired by the projects, videos and files. Would love it if you could leave comments and become a follower. (Word verification is turned ON to avoid spam. Sorry for that inconvenience.) Would love it if you would also share your project here . If you find a linky under the post do share your project by posting link there or if you do not find a linky post your link in the comments.Thank you for visiting. The website Papillon digital designs has changed to Papillon Digital Design so if the link gives and error or takes you to page with chinese characters then please drop the 's' in the link at the end of papillondigitaldesigns and try . That is change papillondigitaldesigns to papillondigitaldesign and try the link.

February 10, 2012

Mono Colours

Good Morning,
All over the U.K there's been snow apart from where I live, we had about an inch of snow last night. Not enough to make a snowman though. Today I thought I'd share with you how I pick my copic colours especially when I'm trying to keep the colours in one tone (technical term is Monochromatic colouring).

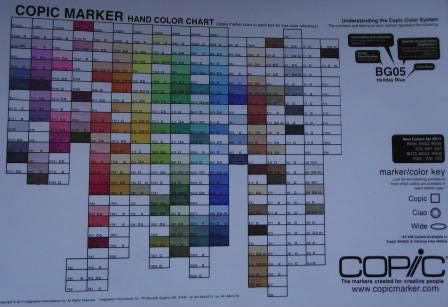
When I got my sketch markers, the first thing I did was download a colourable colour chart from the copic website. (there is a updated one that has the new 2012 colours on, I just need to colour it in). This chart is great as everything is in it's colour family and you can see at a glance which colours go together.


I have some images that I've coloured to show how I used the colours. Except for the hair and skintone of course. All the images are by Saturated Canary.


The left image was coloured in using colours from the RV section. The right image was from the BG section.


The left R section and the right the B section.


The top image was from the BV section and the bottom image is from the R section.

Tomorrow I will making these images into card. Most of the time I choose my papers first then colour the image in whilst comparing the paper colours to my chart. This time I just wanted to colour in with no restrictions. I have lots of plain coloured card stock, so I'm sure if I don't have any papers that I can make my own using embossing folders, stamps etc.

Thank you Pam for having me today.

Kelly x

6 comments :

Unknown said...

Wow...I just bought 2 sets of copics...6 in each set, so I have 12 markers to play with a bit. I need to figure out how to use them now! Your images are amazing!

LisaB said...

Thanks for sharing! Love this idea!

mfc.melissamade2 said...

Yes!! The color chart is so important to do yourself too! It enables you to match papers and embellishments as well as knowing the true colors of your markers!! Love it!
hugs,
M

papillon digital design said...

This is beautiful coloring. Thanks for sharing Kelly.

Michelle said...

Love your colouring - may need to check out that site for the images too.

Cindy Vernon said...

Fabulous information.TFS

"kind encouraging and inspiring words"

I appreciate your comments so much. They are treasured and such an inspiration. Thanks for leaving them.