
Hi everyone! This is Elizabeth from 217 Creations. Thanks Pam for having me over to play! Here in Kansas we are still experiencing a gorgeous autumn, but I can feel the beginning of winter to settle in. My kids are excited and talking about Santa. We bought firewood last weekend. I am looking at my list to get done over the next few weeks before family arrives. The season is definitely upon us. But through all the hustle and bustle I need to find time to make cards for family and friends. This is one of many that I am making "prototypes" for this holiday season.

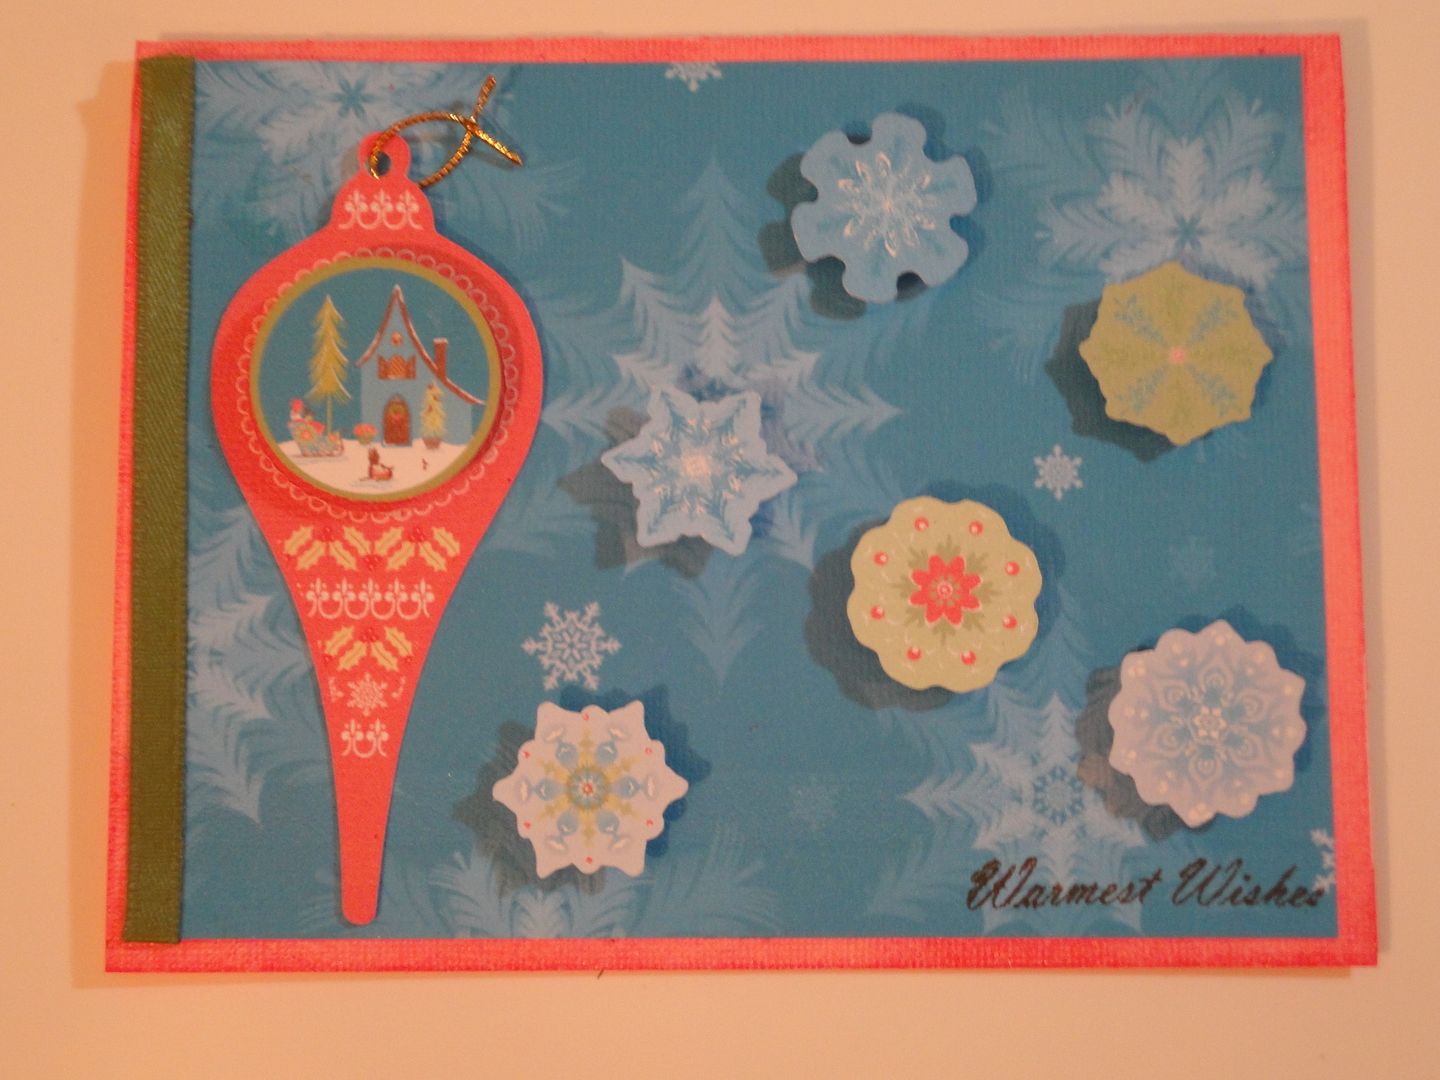
The paper was printed using my Imagine. This pattern is a pre-designed pattern from Snow Angel and was printed using a textured white cardstock. I printed at 12x12 and then trimmed a mat for the card at 4 inches by 5.25 inches.

I stamped the sentiment "Warmest Wishes" from Pink by Design Stamps Winter Fun in Walnut Stain Distress Ink. I then wrapped the matting with a sage green ribbon and glued it down. Then I mounted the matting to base of the card.

Next I began to assemble the embellishments. I cut the ornament at 3.5 inches with the layers separated. The beauty of the Imagine is that each cut on the Imagine cartridges can be either cut all together and flat or cut in separate layers. For this card I chose to "break" the layers to form the ornament. I popped the top layer off the middle. I then punched a small (yes and crooked! UGH!) hole in the top of the ornament. I then tied a gold thin ribbon through the top.

I really wanted to cut several of the snowflakes on this cartridge. There are so many varieties that I could not put all of them on my card. So I chose a few to pull it together. They were cut at .8 inches. I also used pop dots to raise the flakes off the card
Now that I have made this "model" I know I can easily assemble many of these quickly, yet they look high quality. I simply love the ornaments on this cartridge. They remind me of the ornaments my mom and grandma used to always decorate the tree with! They are like little vignettes. I just love the holidays!

As always thank you for commenting and following or subscribing. Have a great day!