
 Hi all,
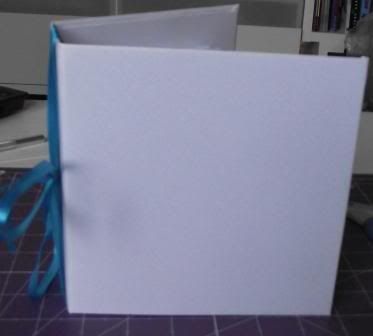
Today I thought I'd share with you a mini book I've made. I've made it in the view of using it as a notebook for all of my pen colour combinations for my stamps I've coloured in. It's also a way to experiment with colours and to make a note for future reference.
Here's how I made it.
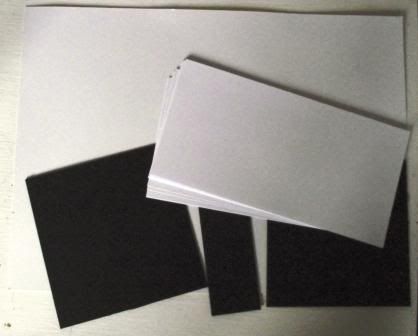
First you need 2 pieces of chipboard cut at 6 inches by 6 inches. 1 piece of chipboard measured 6 inches by 2 inches. 12 pieces of white card that you use for copics or promarkers measured 10 inches by 5 inches. For the cover you need a piece of card measured 8 inches by 16 inches and another piece of card measured 5 3/4 inches by 14 1/4 inches. I chose white pearlescent card but you can use anything you'd like.
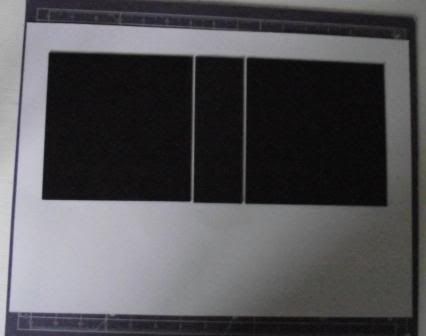
I place my chipboard on my card. I had a A3 size piece of card so I hadn't cut it to the measurements above yet. You can see there's a about 1 inch around the outside of the chipboard. You need to stick the chipboard down with strong adhesive. I used scor tape.
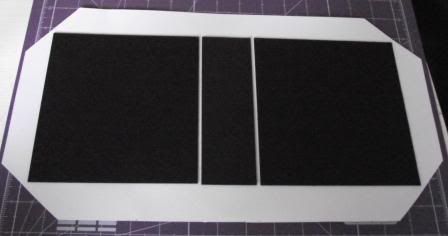 Next you need to cut the corners off. This is so when you fold the edges in they are neat and tidy. I also sored around the edges of the chipboard and down the spine in the middle.
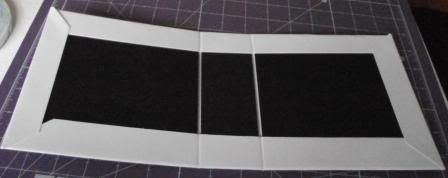 You then need to use your adhesive and fold the edges in. I folded the long edges in first then the short ends. You then stick your piece of card measuring 5 3/4 by 14 1/4 over the chipboard that you can see. I forgot to take a picture of this stage.
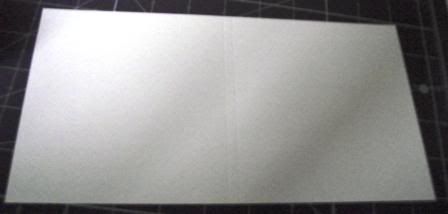
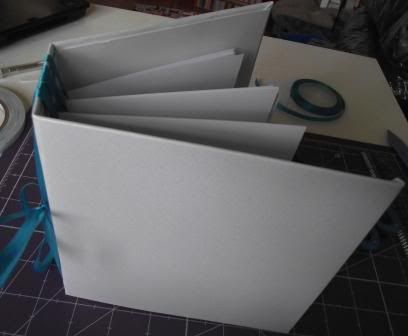
Now you need to score the 12 pieces of card at 4 7/8 inches and 5 1/8 inches. Then fold on the score lines so you have a little spine.
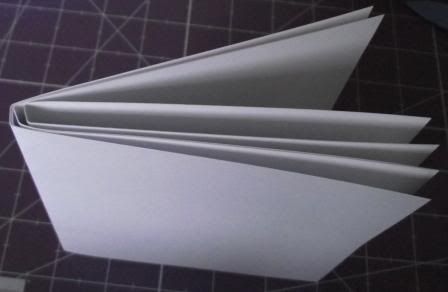 You then need to group the card in three groups. I had 4 cards in each group.
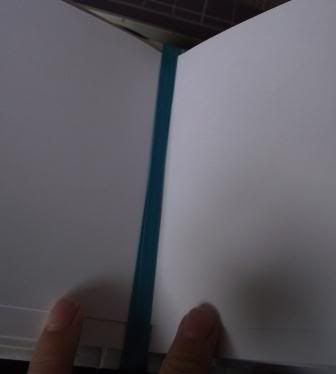
Here is how I attached it to the book. I used ribbon and wrapped it around the card groups and the spine. You place the ribbon in the middle of one set, you then wrap it around the spine. You repeat this step three times.
You can see in this photo how the ribbon wraps around the card.
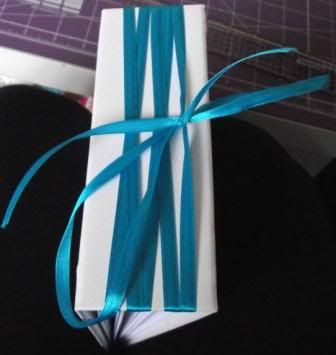 This is what the spine will look like. You can see how it is wrapped around. I then tied the ribbon in a bow. The reason I used ribbon is so I can add pages to this book. There's plenty of room for expansion.
 Now all I need to do is decorate the covers with stamps etc. I will then stamp the same image on the pages in my book and use different colour combinations to colour them in. Making notes around the image of what pens I've used.
I hope you find this tutorial useful. I want to say thanks to Pam for having me as a designer today. Don't forget I have some blog candy and it's ending tomorrow and as more than 50 of you have entered it I will be adding some more goodies to the pile. Thank you to all of you that also choose to follow me I really appreciate it x
Kelly x