f The Bugbytes: Forever Inspire

Welcome - Copyright & Disclaimer

Welcome to The Bug Bytes a site/blog mainly for Papercrafting and some photography and other stuff thrown in here & there. Add in some die cutting machine, scrapbooking tools, cameras, scissors , glue and...... My name is Pam. If you have been redirected from Papillon Digital Design you have come to the right place.Hope you get inspired by the projects, videos and files. Would love it if you could leave comments and become a follower. (Word verification is turned ON to avoid spam. Sorry for that inconvenience.) Would love it if you would also share your project here . If you find a linky under the post do share your project by posting link there or if you do not find a linky post your link in the comments.Thank you for visiting. The website Papillon digital designs has changed to Papillon Digital Design so if the link gives and error or takes you to page with chinese characters then please drop the 's' in the link at the end of papillondigitaldesigns and try . That is change papillondigitaldesigns to papillondigitaldesign and try the link.

May 10, 2010

Forever Inspire

Hi everyone! This is Elizabeth "makeupgirl217" from www.217Creations.blogspot.com.  Before I go into the assembly, I want to give Pam a huge thank you for once again welcoming me to her website.
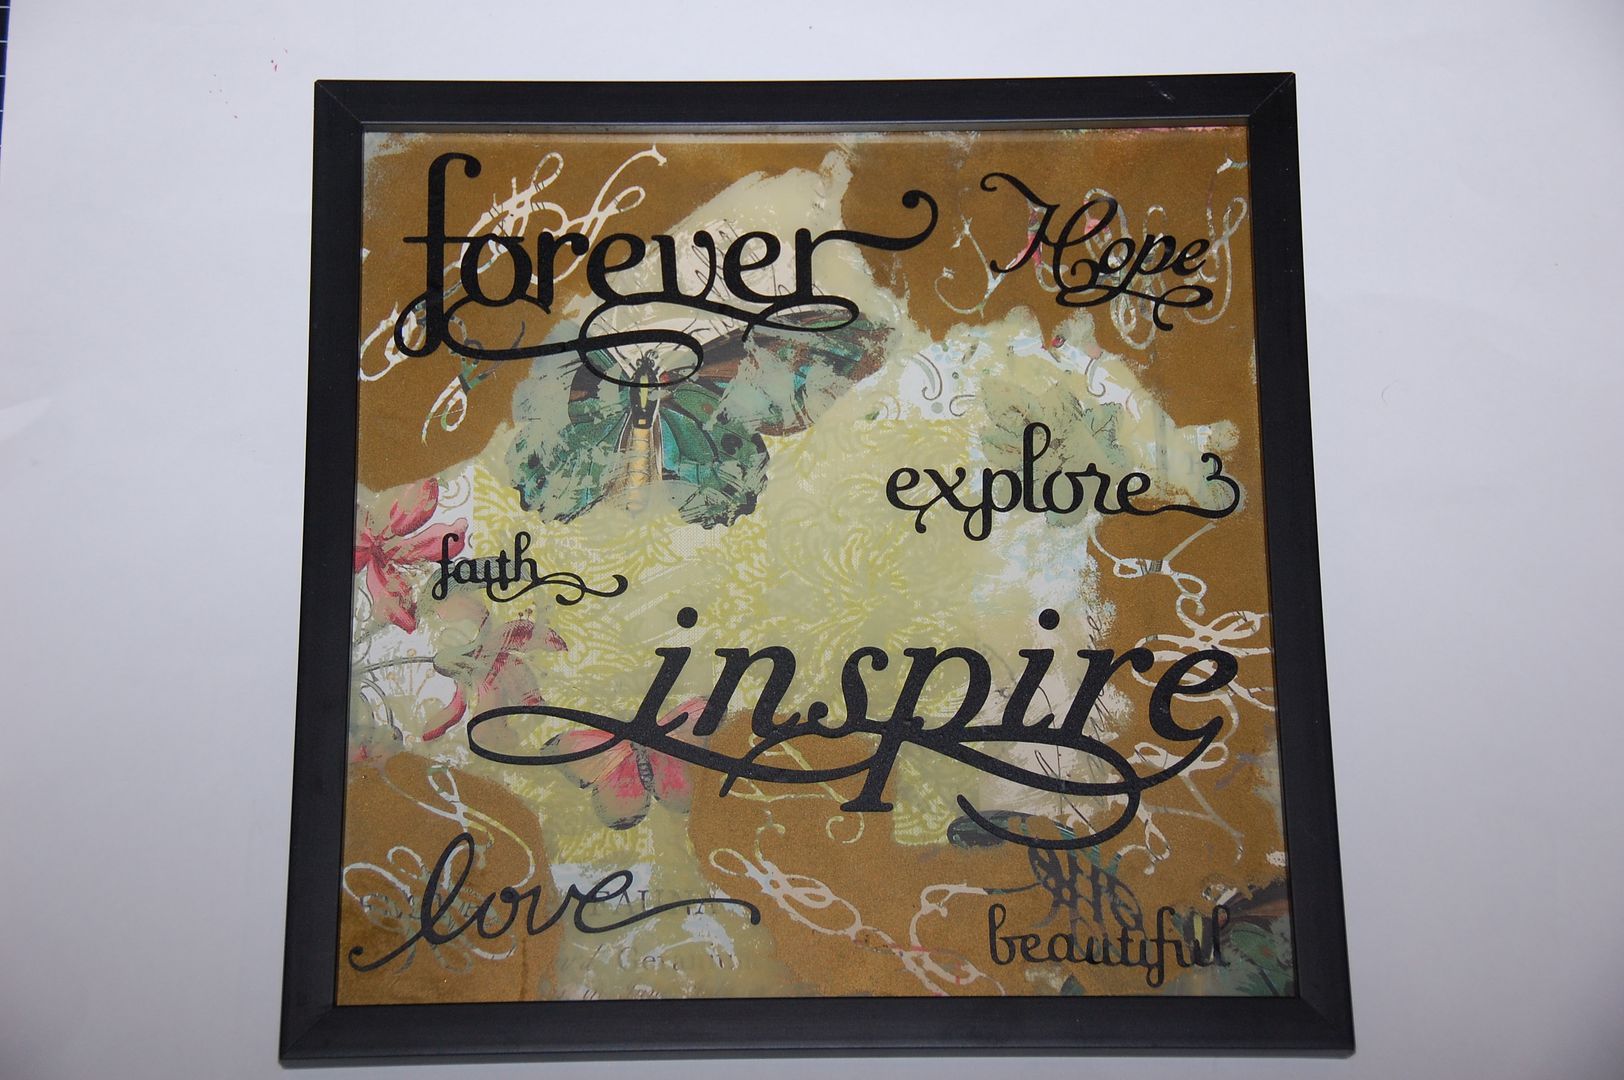
I started this project with the intention to make a lace paper overlay. As you can see from the pictures, that did not happen.  Which at the time was upsetting, but I am very happy with the outcome.  
I bought this frame at Hobby Lobby (They are 50% off this week).  I started by dismantling the frame, separating out the glass.
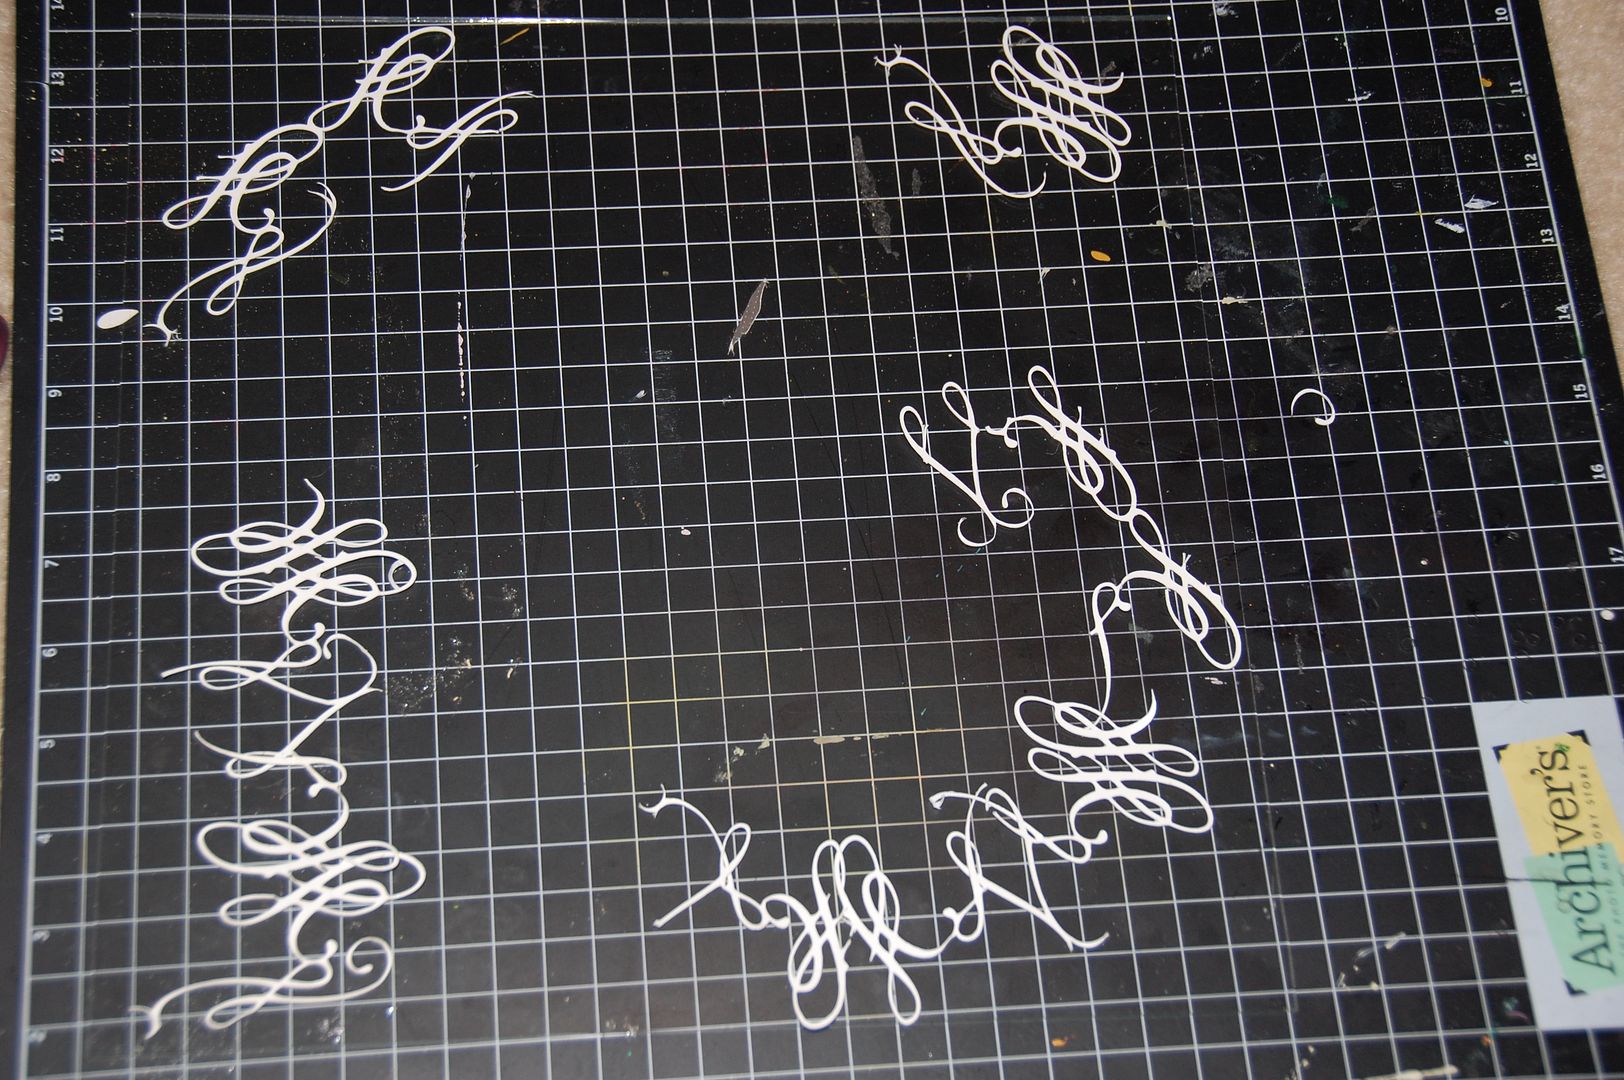
I welded several scrolls together from Home Decor.

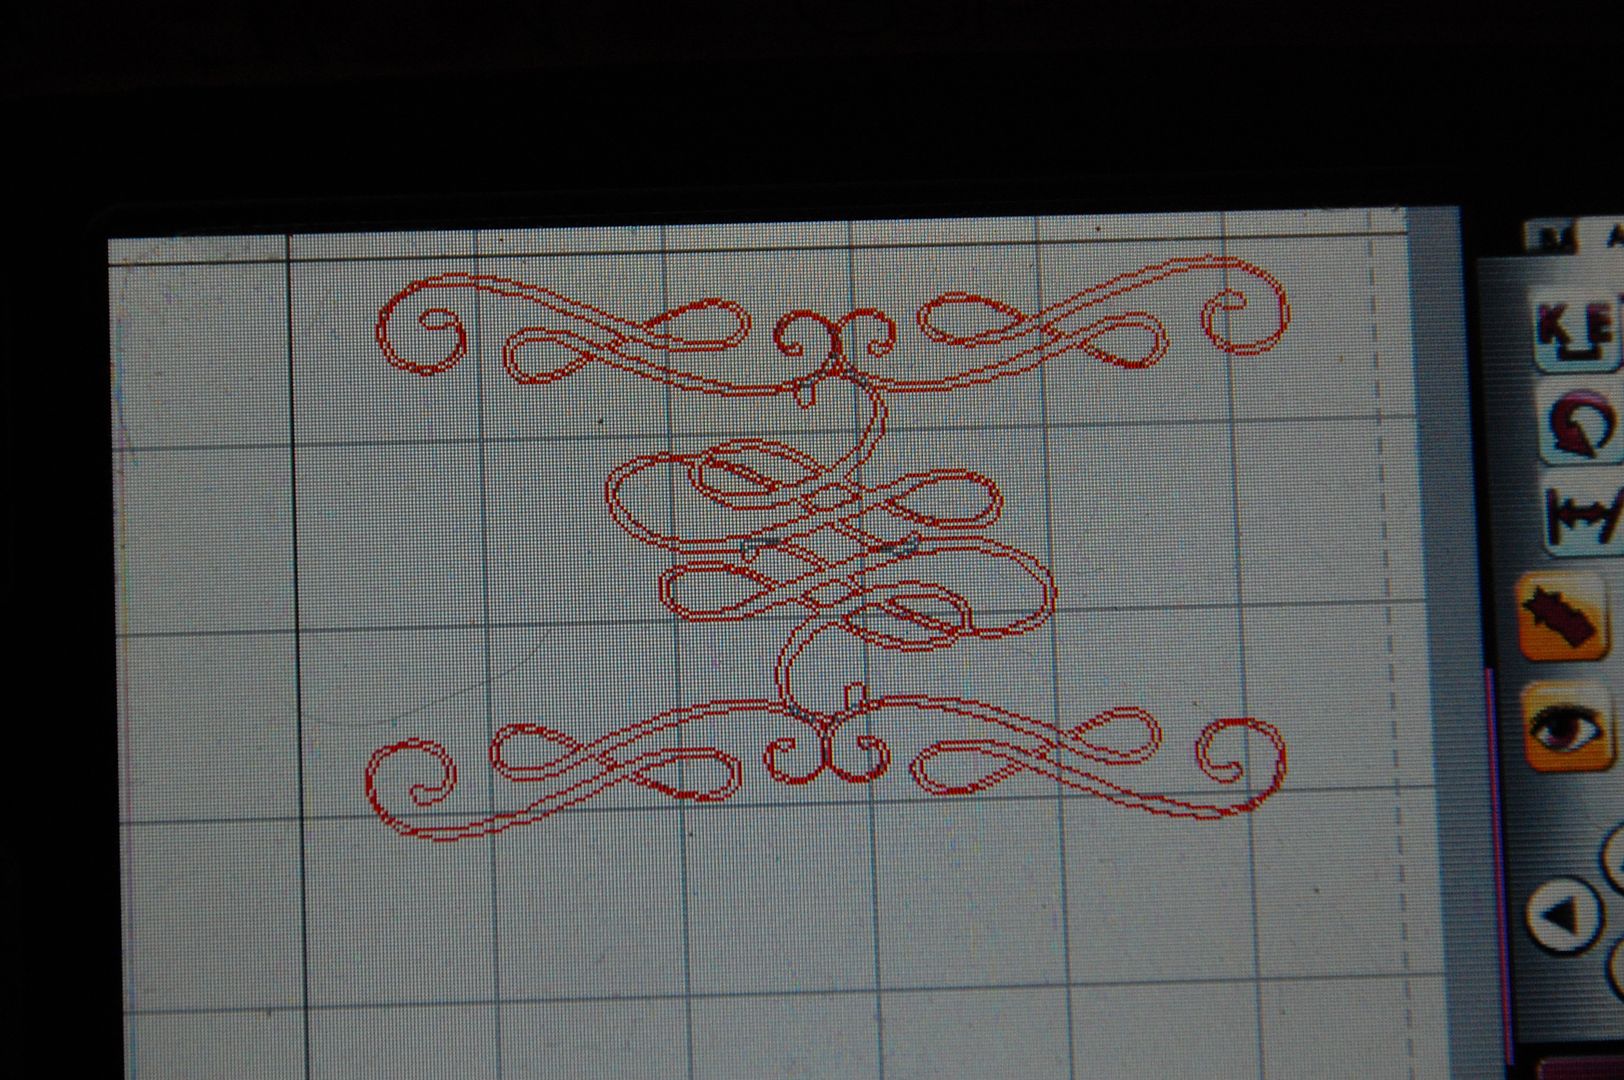
Most of the scrolls are cut at about 1.5 inches.

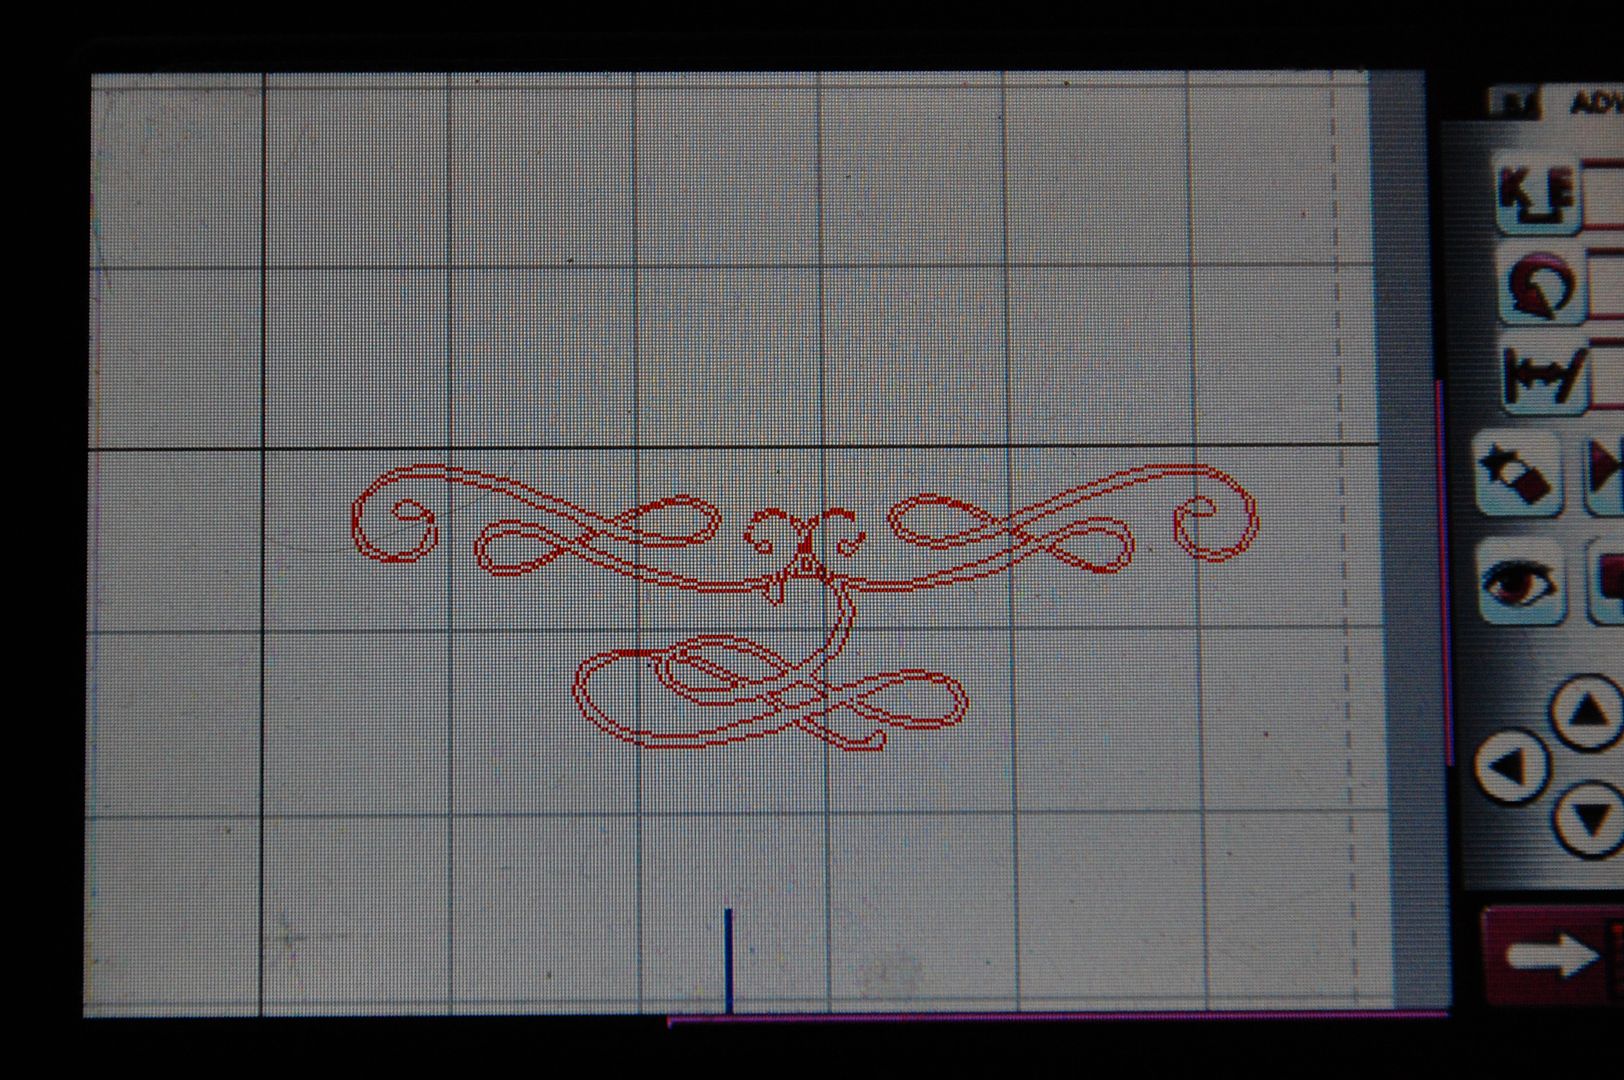
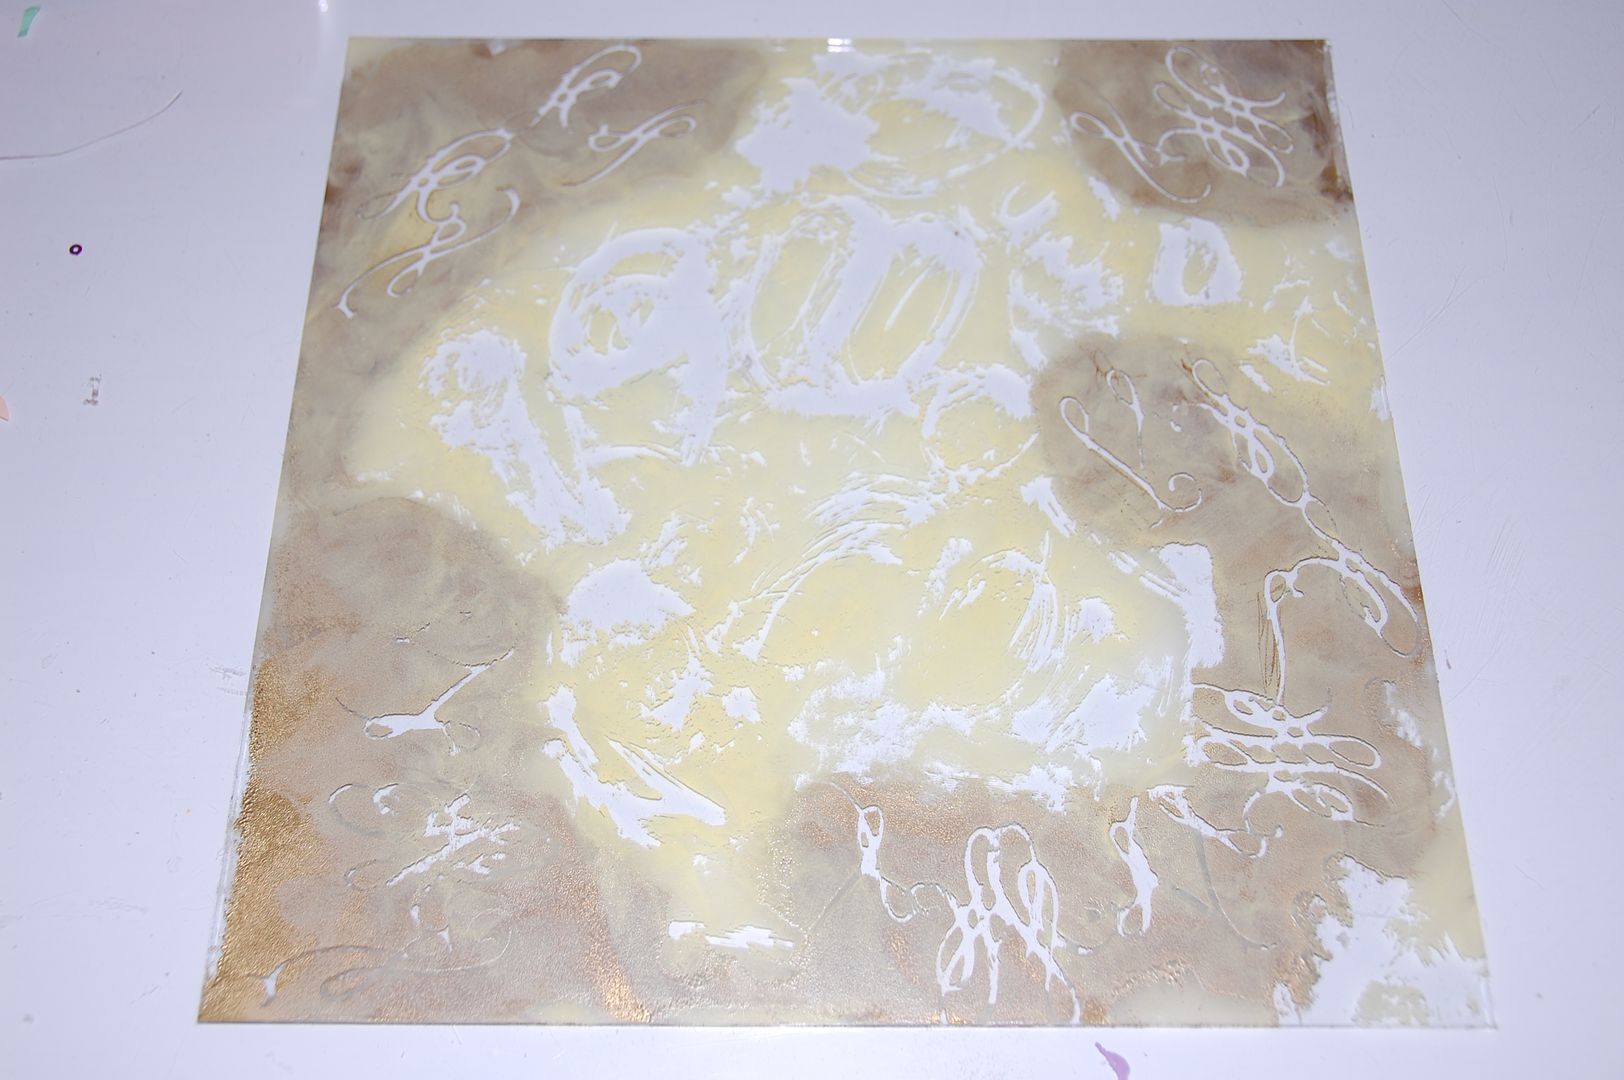
I then took pieces of the welded scrolls and laid them on the inside of the glass.

Gently, I used a clear embossing ink pad and pressed it firmly on top of the scrolling.  Then I peeled up the scrolling, leaving negative stencil like spaces.

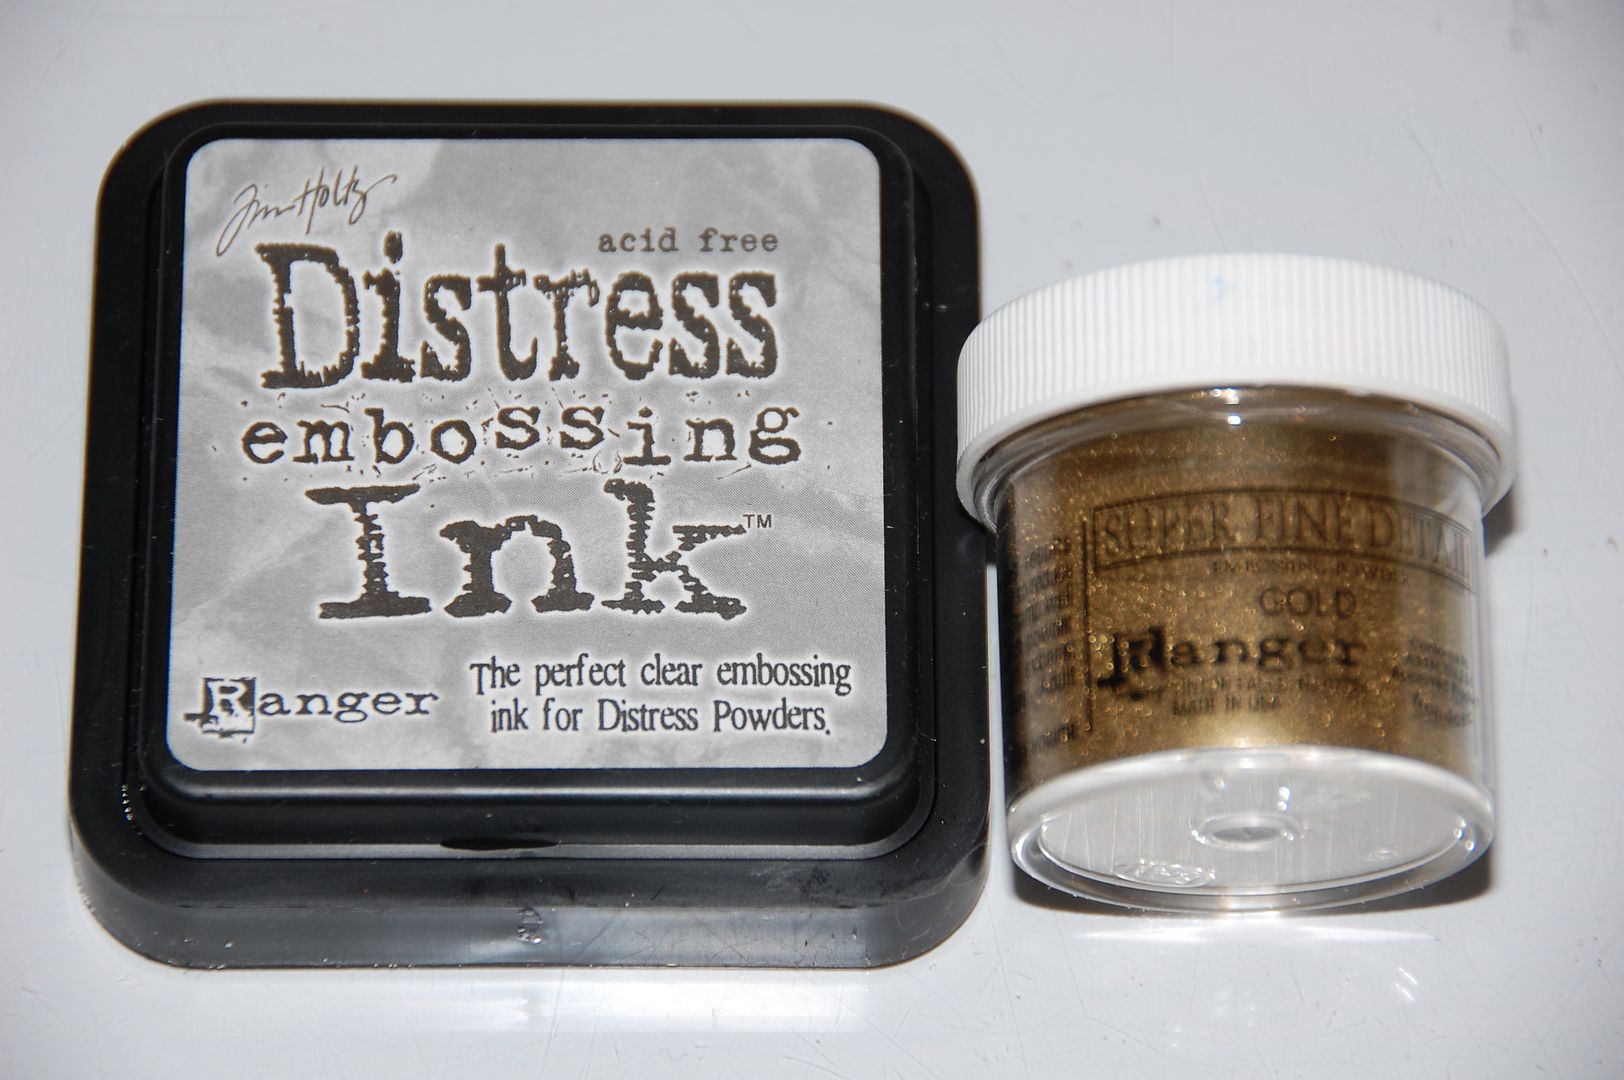
Next I sprinkled Gold Ultra Fine Embossing Powder on top of my wet ink. I heated the embossing powder until it melted. Next I buffed away some of the powder with a sanding block.

Finally I took Staz-On in Butter Cream and smeared the ink all over the inside of the glass. To break up the opaque look of the ink, I took a baby wipe and began removing the excess ink from the glass.

Once I had it the way I wanted, I set the glass aside and began the inside of the frame.
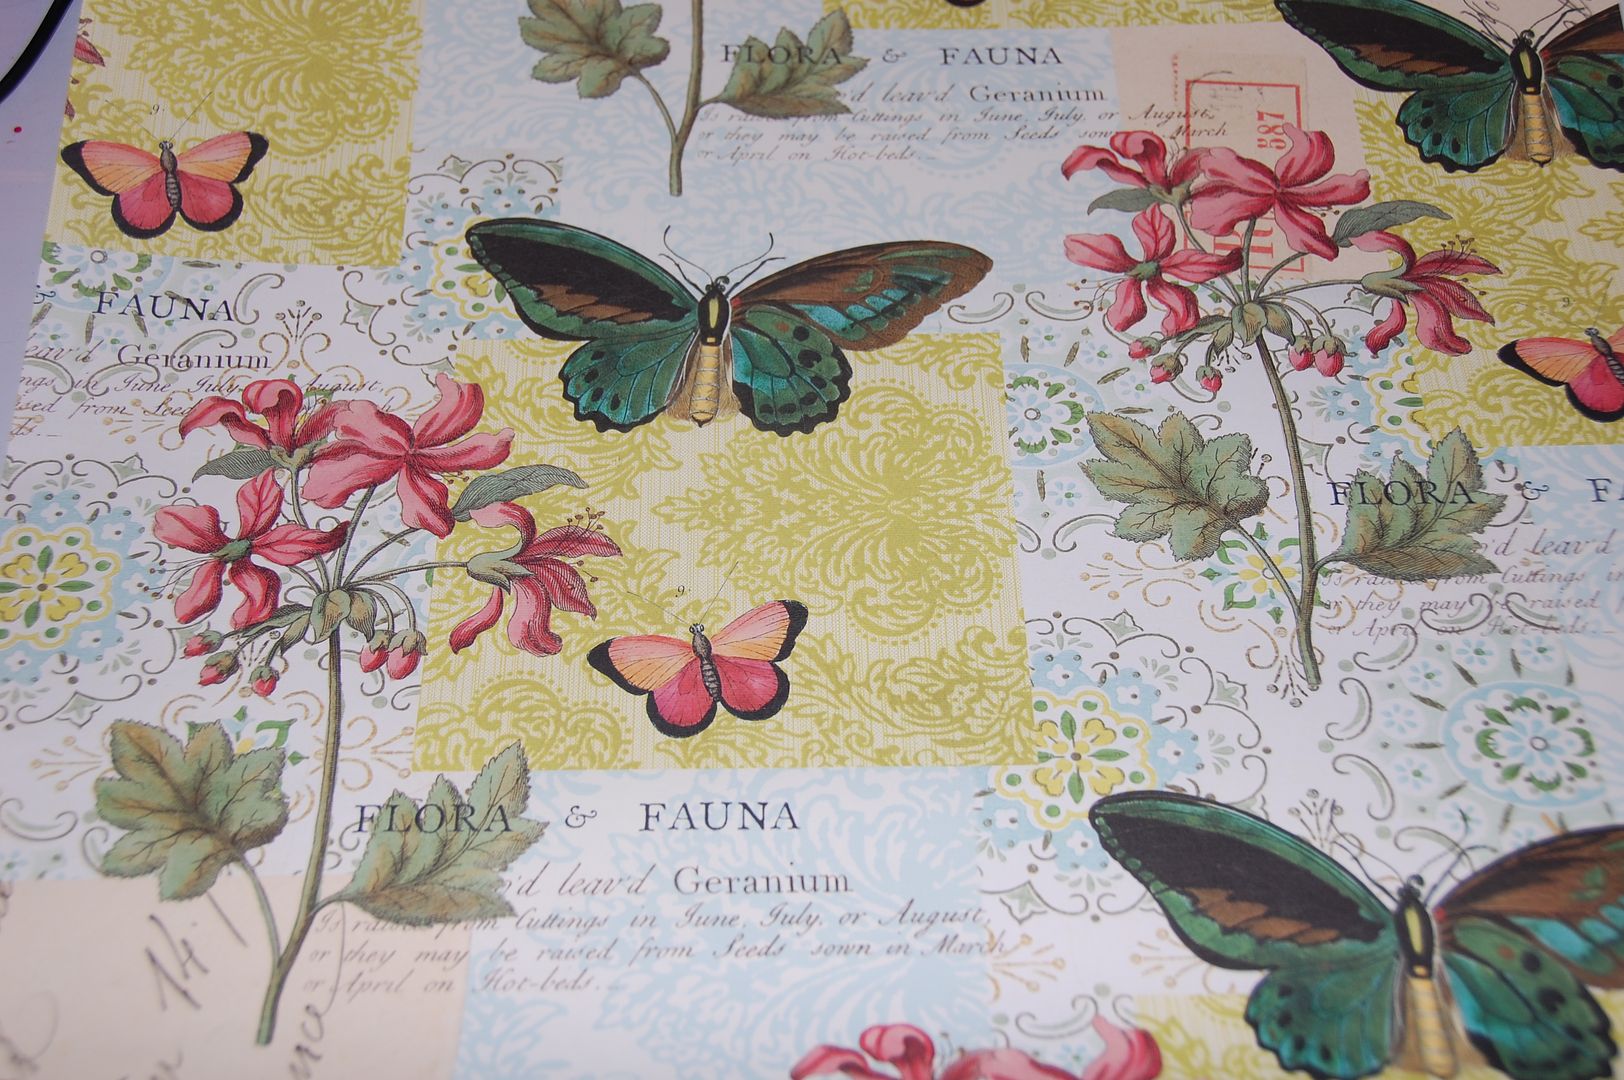
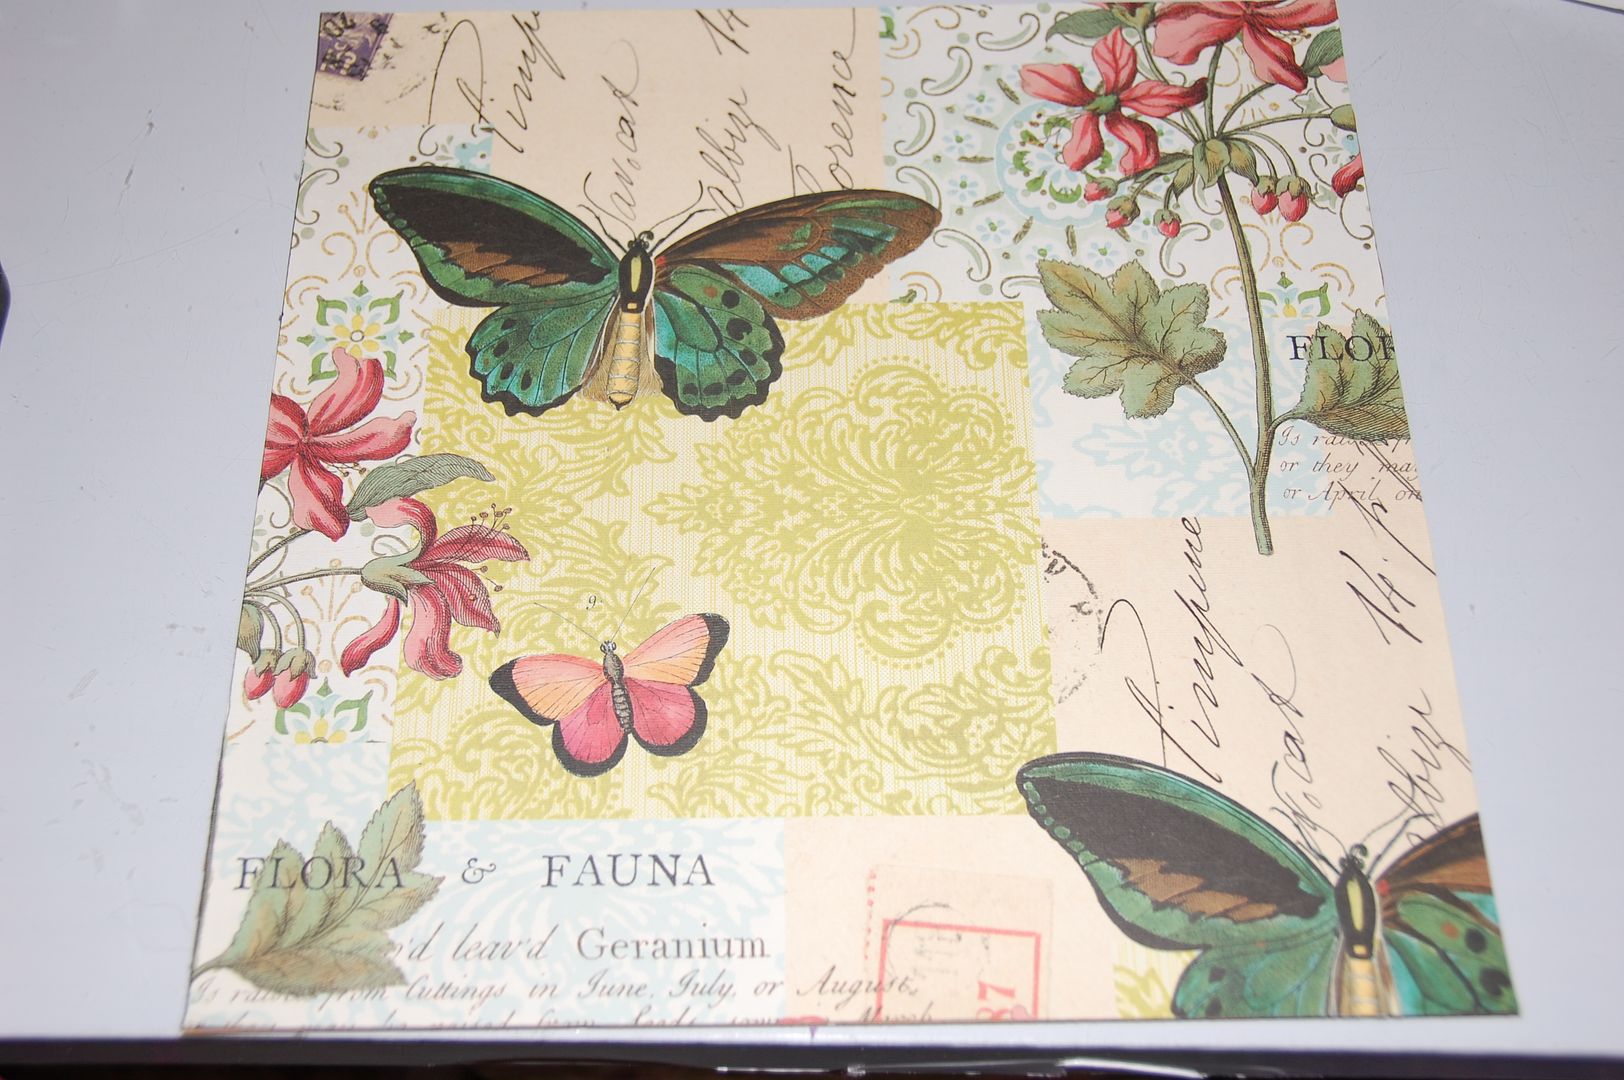
I took a thin layer of rubber cement to the backing board of the picture frame and let that begin to dry.  My background paper is from a store here in Kansas City called Urban Arts and Crafts.

They sell the most beautiful papers on large sheets.  Some of the sheets are as big as 36 inches by 36 inches.  I cut my background paper to 12 by 12 and applied a thin layer of rubber cement to the back side and let it dry. Once the two pieces had dried, I placed the together forming a smooth bond.  I used a brayer to roll out the edges.

Then I assembled the frame back together.
My final step was the phrasing for the glass.  I just love all the phrases that appear on Home Decor (HD) and Home Accents (HA).  All of the wording was cut from black matte vinyl.
 The sizes and cartridge used are as follows:
  • Beautiful 3.0 inches (HD)
  • Faith 2.5 inches (HA)
  • Explore 4.5 inches (HD)
  • Inspire 9.5 inches (HA)
  • Love 5.0 inches (HD)
  • Hope 3.0 inches (HD)
Thank you for taking the time to leave comments and best of all following or subscribing! Have a great day!

      12 comments :

      Sheila aka SassyLady said...

      Elizabeth this is beautiful! So unique and it looks so delicate! Thanks for sharing.

      papillon digital design said...

      Oh wow. How wonderful. Nice new technique too embossing the glass. Thank you so much dear. Your projects never fail to wow me!! =>D

      Mrs B said...

      Very pretty! I love the technique you used on the glass.
      CindyB

      Unknown said...

      This is amazing Elizabeth!!! I love the gold, the butterflies and the words! Your talent is endless!!!

      Anonymous said...

      what can I say it is beautiful...You are a true inspiration

      Mandy said...

      That is so awesome! I will definitely have to try that! Thank you for sharing!

      MizMaryAnn said...

      Breathtakingly beautiful.

      Cheryl Boglioli said...

      Truly beautiful project and definitely an inspiration piece. I love when mistakes come out even better than we had originally imagined. :-)

      flowerdisco said...

      this is a beautiful project elizabeth...wow!!!

      WrinkleFreeDiva said...

      Absolutely beautiful!

      Karen said...

      My goodness, that is a beautiful piece. I would never have thought of using embossing poweder on glass! Great ideas!

      TR said...

      very "inspiring" :)

      "kind encouraging and inspiring words"

      I appreciate your comments so much. They are treasured and such an inspiration. Thanks for leaving them.