
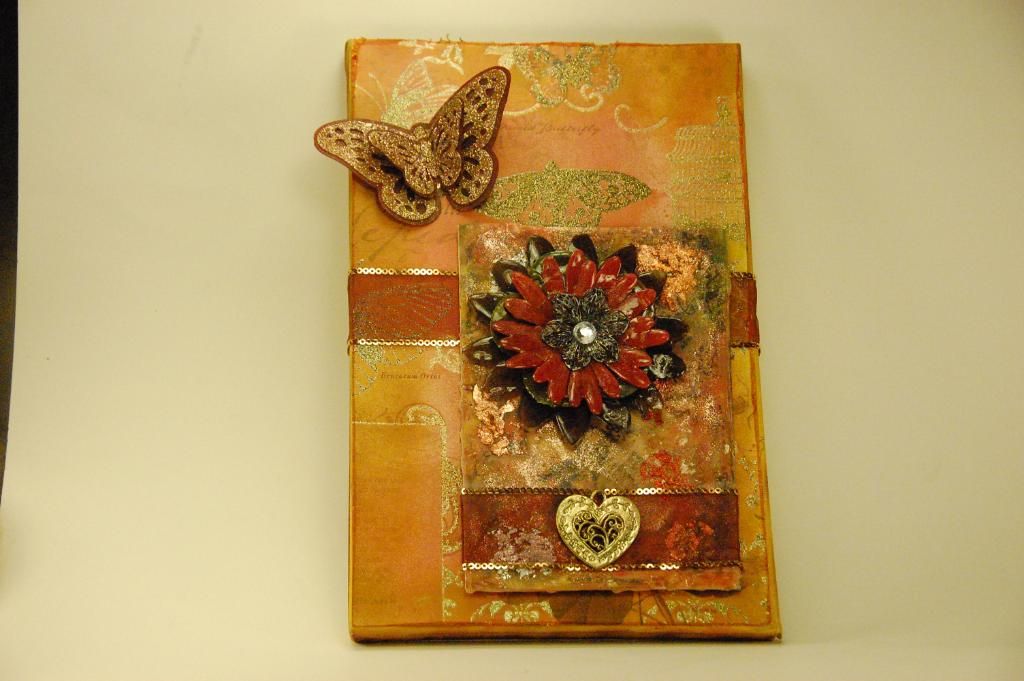
Hi everyone! This is Elizabeth from 217 Creations. Thank you Pam for letting be your designer today! I have such a love for butterflies. Mariposa from DCWV is a butterfly lover's dream. So hang on for a technique filled canvas!
I started with an inexpensive canvas from Michales. I bought it off the clearance. In fact it had a color by number project for kids printed on the front. I began by coating the edges with warm mustard yellow acrylic paint. Once the paint was dried, I inked up the sides with Vintage Photo Distress Ink.
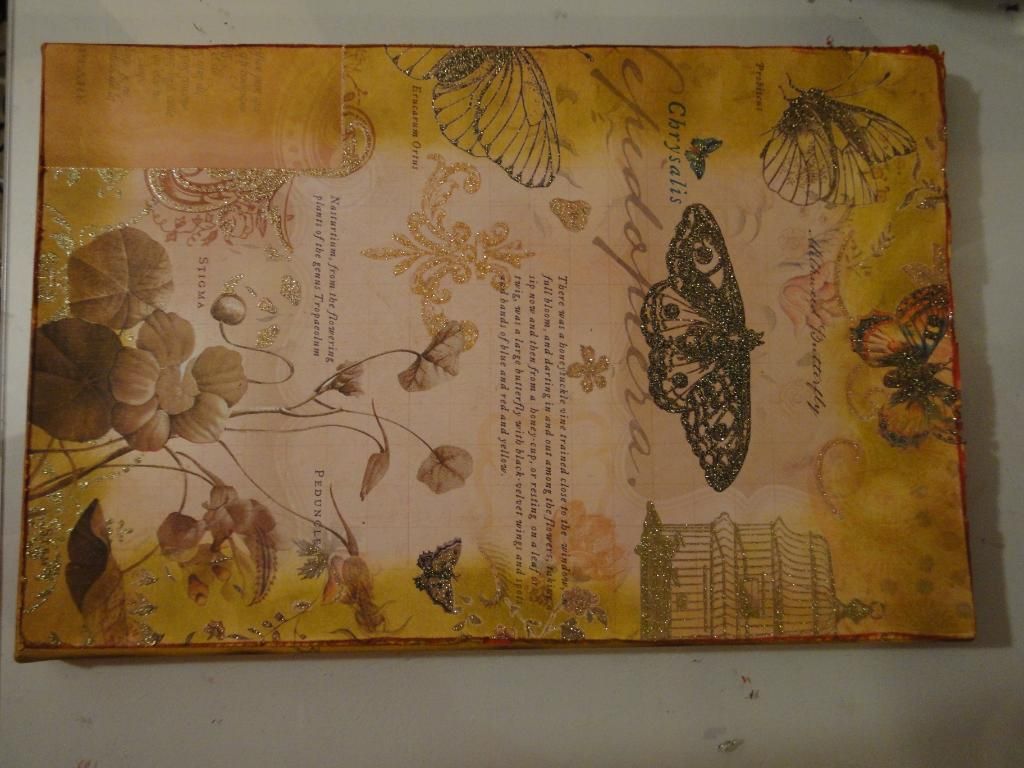
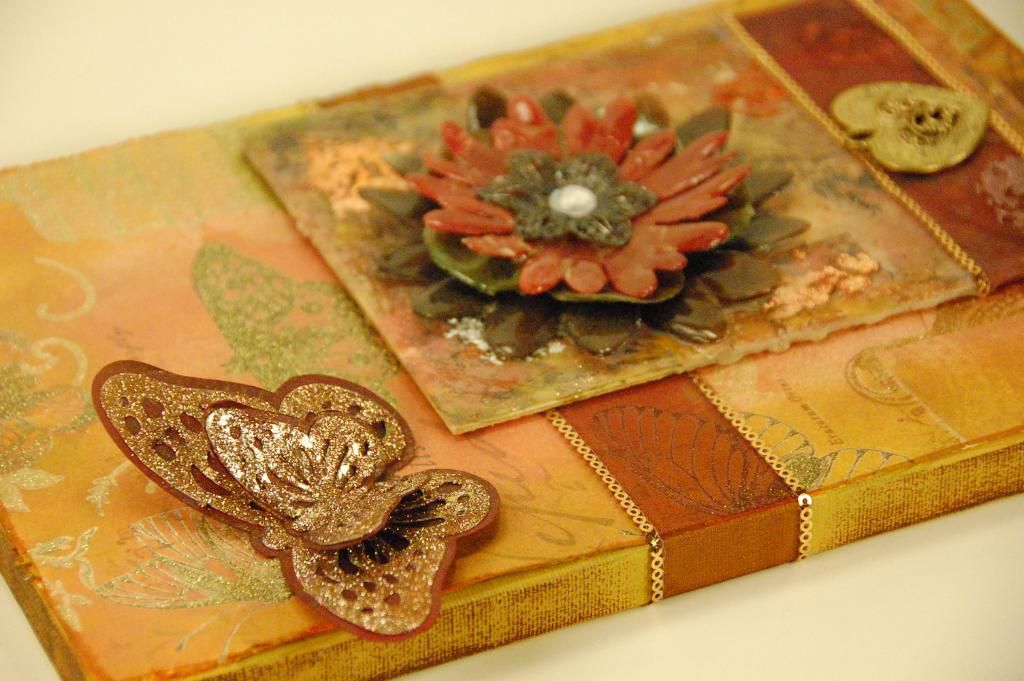
Next I started work on tinting the paper. The gold glittered butterflies and cages and visible but do not pop as much until I began inking and misting.

I stated with Scattered Straw Distress Ink and Rusty Hinge Distress Ink.
Next I misted with Sugar Maple, Santa Baby, Wheatfields, and Tattered Leather Glimmer Mist. I used my Zutter Distrezz It All and shredded the edges. I inked the roughed up edges with Vintage Photo Distress Ink. I then adhered the paper to the canvas.
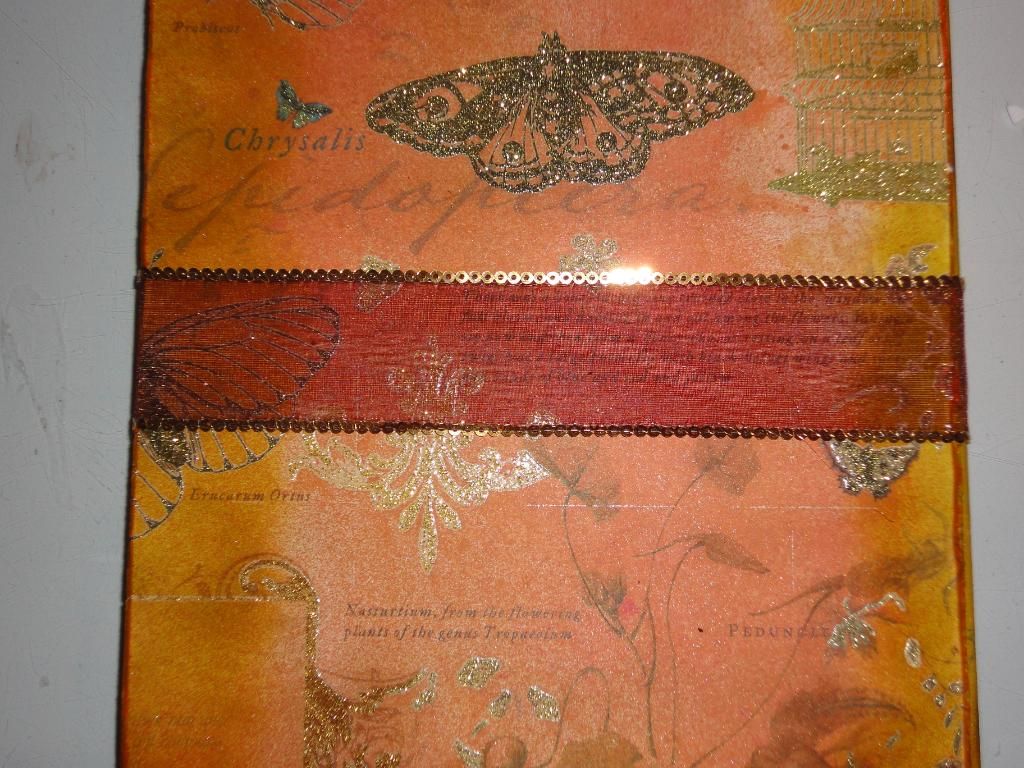
Next I wrapped ribbon around the canvas and attached it to the back of the canvas.

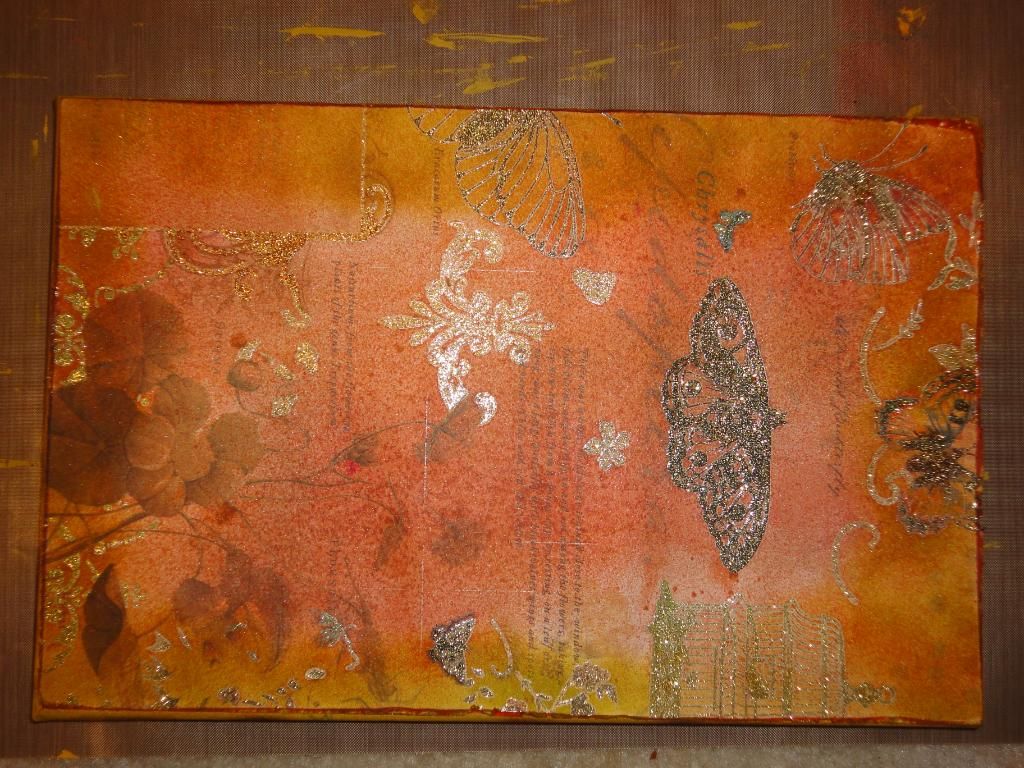
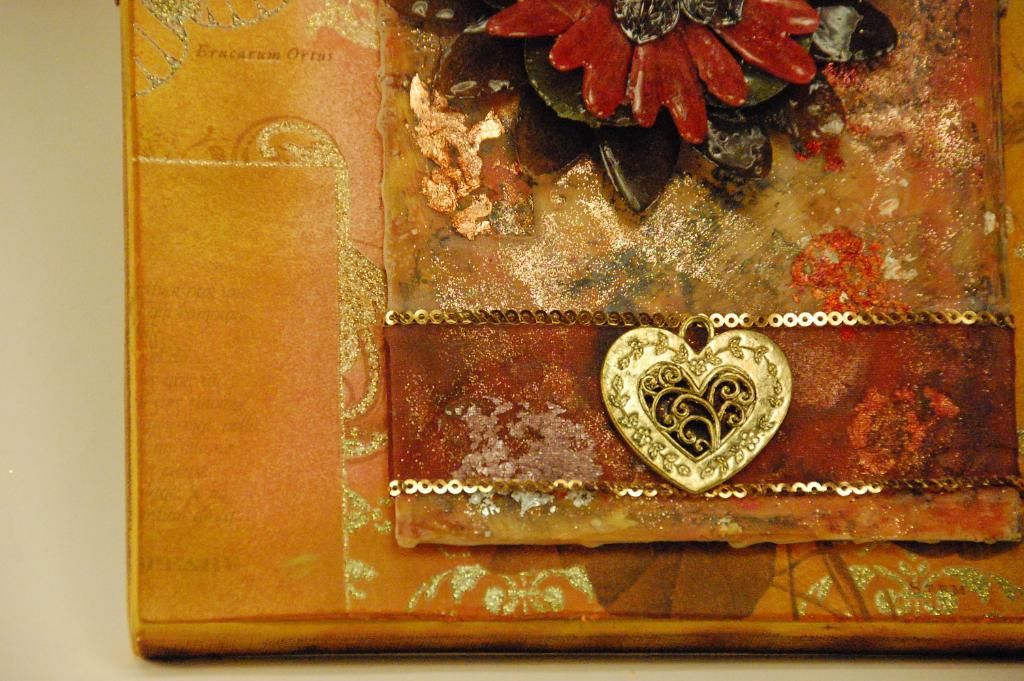
Then I stated working on the waxing of the mat board. I did several layers on melted wax on the mat board. I pressed gold and copper leafing between the layers. Then I used pastels to tint the wax.
I am still working to perfect this technique. I will post a video once I feel comfortable.
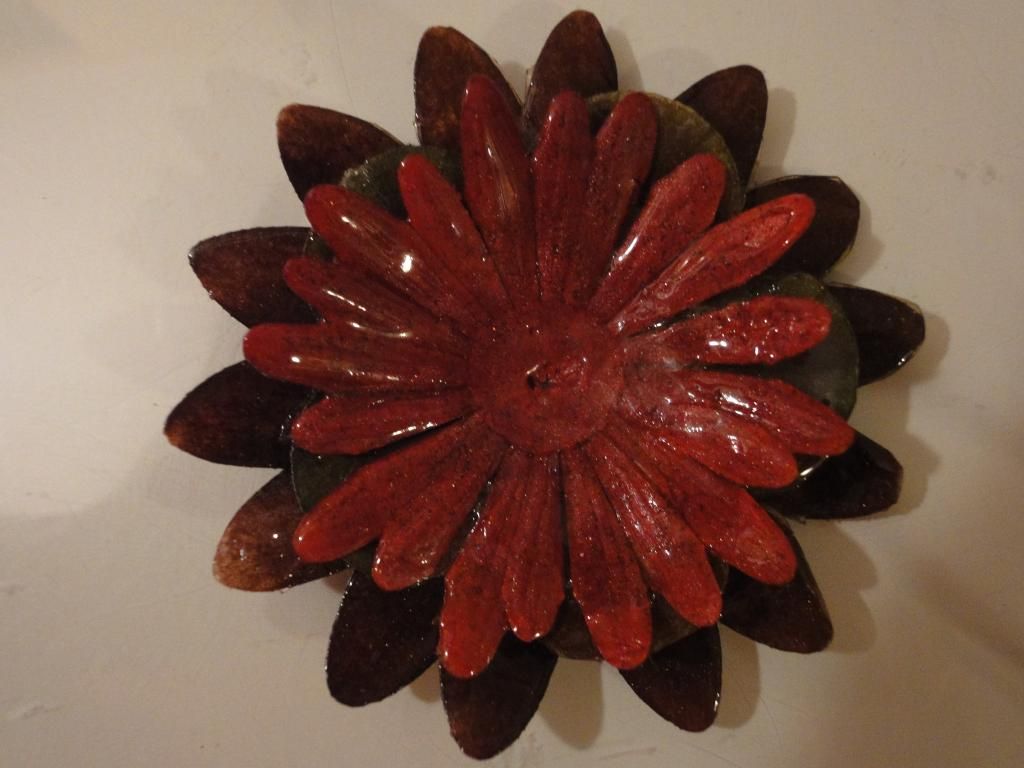
Next I focused ont he flowers. These were white plain Primas. I used Glimmer Mist in Apple and Tattered Leather for the green and Santa Baby and Sugar Maple Glimmer Mist for the red. for the brown I used Tattered Leather Glimmer Mist. Then I dipped them into melted clear UTEE inside a Ranger Melting Pot.

I used E6000 to adhere each layer of flower to each other. Then I used E6000 to adhere the metal petal to the center of the flower, as well as a clear rhinestone.
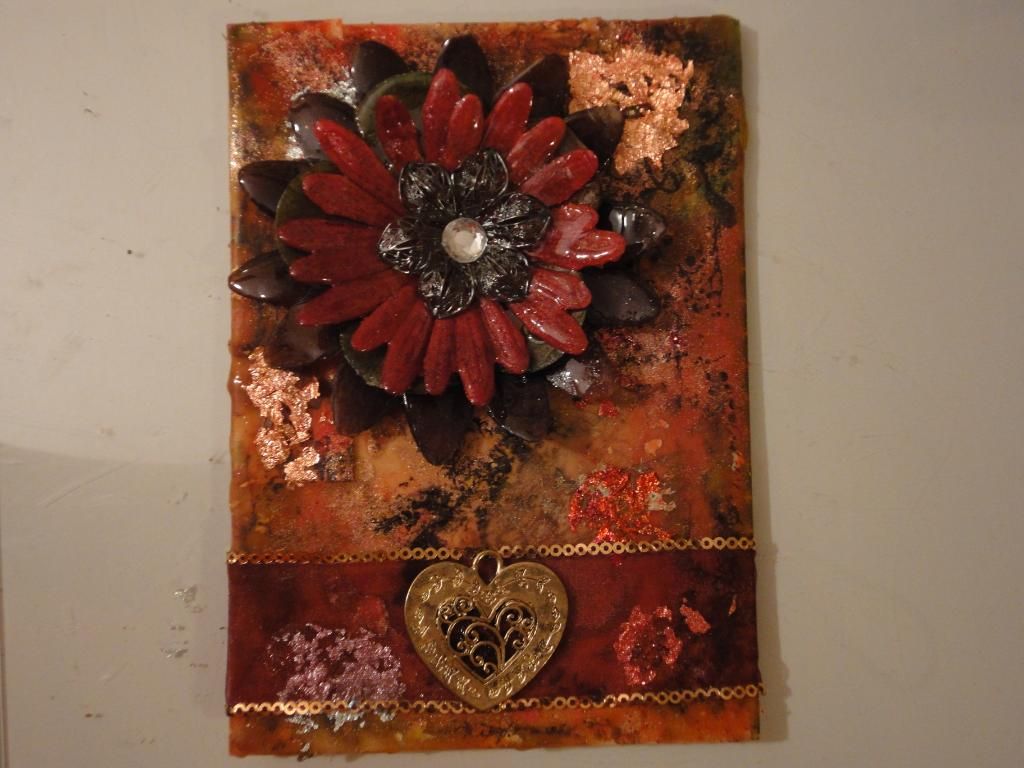
Next I wrapped the same beautiful merlot colored ribbon around the waxed mat board. I then adhered the flower and a gold metal heart to the waxed mat board.
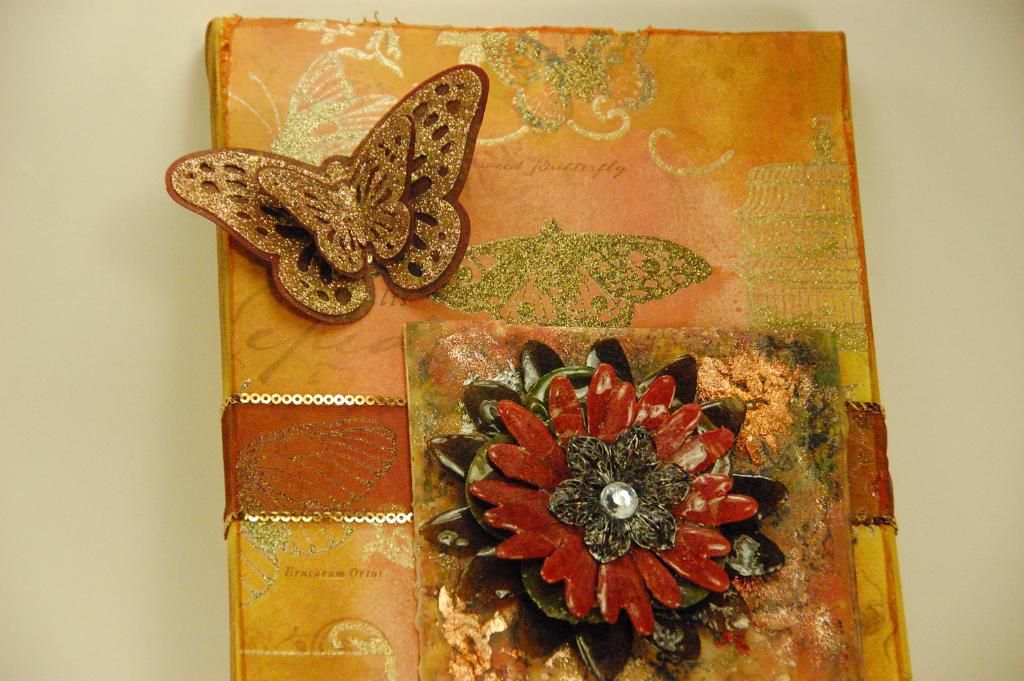
Then I mounted the waxed piece to the canvas. I then added the butterfly cuts to the canvas. These were cut from Picturesque cartridge at 2.18 inches and 1.35 inches. I cut the coordinating blackouts, real size off.

To make the butterfly sparkly, I sprayed with Crater's Companion Red Permanent Spray and then sprinkled Martha Stewart Ultra Fine Glitter. The reason I used spray adhesive is because it will "fill" the holes of the butterfly cut like using Xyron. I gave each butterfly a small crease and mounted it to the canvas.
I have some close ups for you.


I did my best to try and capture all the dimension and depth that this piece has. It so elegant. I love the subtle sparkles.
I have the free Gypsy file on my personal blog at 217 Creations
I hope you have a great day! Thank you for following us here at the Bug Bytes and on my personal blog at 217 Creations.


7 comments :
This is so beautiful Beth. Love it. I love butterflies too. TFS
WOW, this is just out of this world!!!
brigitteetleschats at hotmail dot com
Beth this is just GORGEOUS. I just love the inking you did and your final project. TFS
Wow! I am in just complete awe!
AllisonF
This is so brautiful.
You have shown us so many great techniques
Beth, it's beautiful!!! I love all your creations!!! You are such a great talent, my friend!!!
I love how they have so much depth to them. Very beautiful and artistic!
Hugs and Blessings!
★ Jasmine Wilmany ★
"kind encouraging and inspiring words"
I appreciate your comments so much. They are treasured and such an inspiration. Thanks for leaving them.